Install and configure a DNS server
ispmanager works with DNS server implementations: BIND (Berkeley Internet Name Domain) and PowerDNS. They provide conversion of DNS name to IP address and vice versa. The main advantage of BIND is that it is implemented in full compliance with the official documentation that regulates the work of DNS servers. According to this document, DNS server stores information about domain zones in the form of files. PowerDNS is faster than BIND because it stores information about domain zones in a database. Therefore, if you plan to work with a large number of IP addresses in ispmanager, we recommend using PowerDNS.
ispmanager acts as the primary (master) DNS server. The primary DNS server stores the master copy of the domain zone file maintained by the system administrator. The primary server gets information about the domain zone from its zone configuration files. Secondary (slave) servers receive domain zone settings from the primary server.
DNS server settings are added into the configuration file and are used when creating domain zones. For more information please refer to Create a domain name.
Install a domain name server
Perform the following steps to install a name server:
- In the Main menu navigate to Settings.
- From the drop-down list, select Software configuration.
- In the list select the Name server (DNS) and click on the context menu button "...".
- From the drop-down list, select Edit.
- Select the DNS server you want to use.
- Click Save.
DNS server installation will be performed in the background.
Configure a domain name server
To configure the DNS-server:
- In the Main menu open Domain names (DNS) page.
- In the form that opens, click on the Default Settings button.
-
Fill in the fields:
- Name servers - name servers that will handle the newly created DNS records for this domain. They are specified in the NS-records;
- Administrator email - is specified in the SOA records of the newly created domain zones. Learn more under Resource records;
- DMARC record - a template, according to which a TXT resource record of a domain zone is created. Used to configure the DMARC mechanism. This mechanism sets the policy for checking incoming mail in the domain;
- SPF record - A template used to create a TXT resource record of a domain zone. Used to configure the SPF mechanism. This mechanism specifies the policy for checking incoming mail in the domain. Use the "_ip_" macro in the template to replace IP addresses. The addresses are specified with a space in the SPFRelayIP parameter of the ispmanager configuration file (by default /usr/local/mgr5/etc/ispmgr.conf). For more details, see the ispmanager configuration file article;
- Apply to existing checkbox - check the box if you want to apply changes to name servers, admin email, SPF, DMARC and server name for SOA records to all existing domain names. Otherwise, these settings will be applied only to newly created domain names;
- Subdomains - list of subdomains that will be automatically created when creating a new domain name. They are specified in resource A-records of created domain zones;
- Mail servers - servers that will receive domain e-mail. They are specified in the resource MX records of the created domain zones. A full domain name must be followed by the dot (such as mail1.mydomain.com. mail2.mydomain.com.). If it is a record in the current domain, the dot is not required (mail1 mail2).
- IP addresses for name servers - used when creating records. If the NS record lies within the domain zone being created, resource A and AAAA records are automatically created for the NS servers. If this field is not specified, the IP address of the primary domain zone is used for the first NS record, and the address of the secondary domain zone is used for all other records. If secondary name servers are not configured or an insufficient number of IP addresses are specified, an error will be received;
- Server name for SOA-records — provide a value for the SOA-record, if you want the server name defined in the SOA-records (MNAME) to be different from the hostname of the server processing DNS requests. Leave this field blank if you are not sure that you really want to change it;
- DNSSEC support checkbox - check it if you want to enable DNSSEC support.

- Click Save.
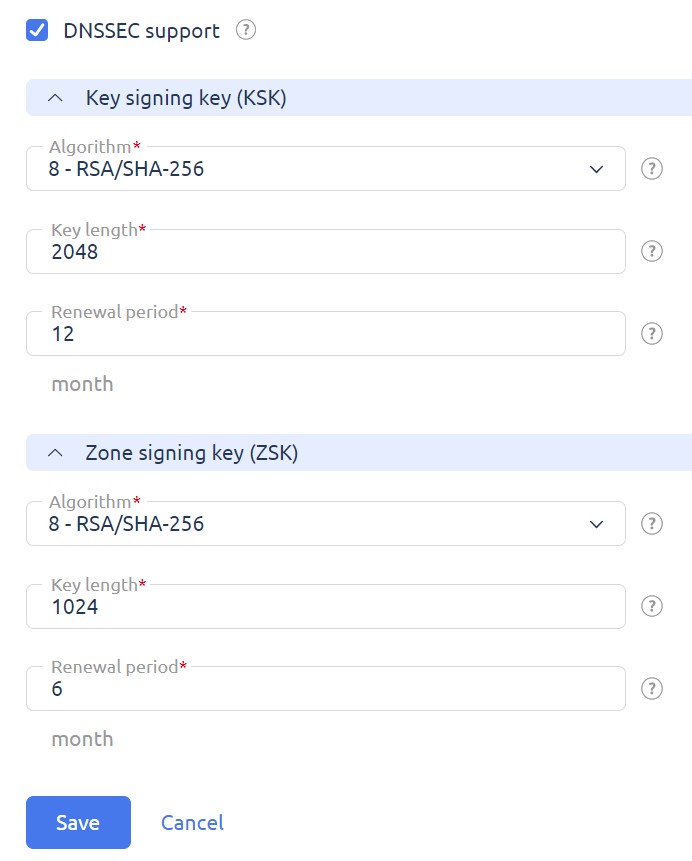
DNSSEC support
To configure DNSSEC:
- Enable DNSSEC support in the settings by checking the appropriate checkbox.
- Configure the newly appeared sections Key signing key (KSK) and Zone signing key (ZSK):
- Algorithm – algorithm used to generate a key;
- Key length – number of bits in the key;
- Renewal period – time (in months) of key update, after which a new key will be generated..
- Click Save.
For more information please refer to the DNSSEC configuration article.