File manager
File manager is specially designed to work with the file system through a web interface. Using File manager, you can perform the most common operations on files and directories:
- create and view
- copy and move
- delete
- archive and extract;
- download and upload
- edit the properties
Interface
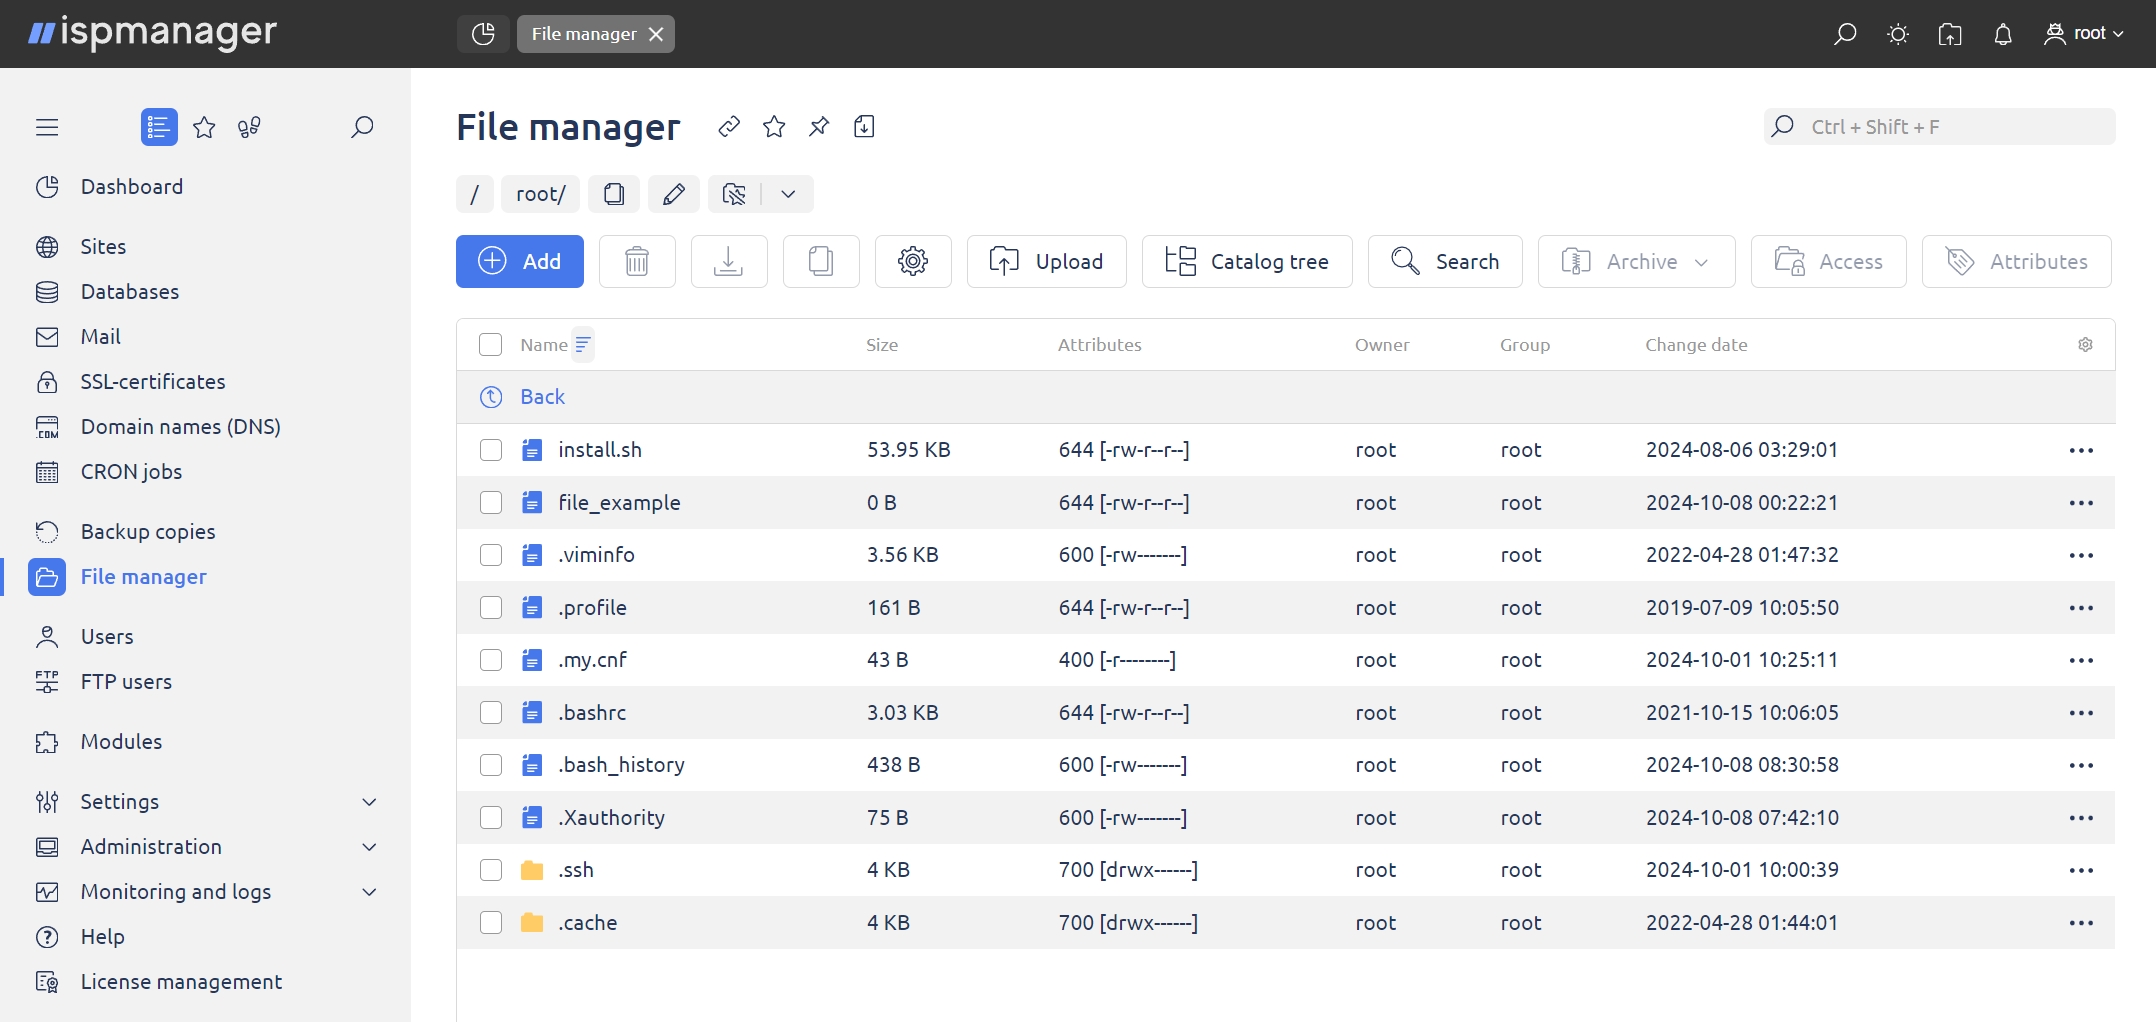
- Name — name and type of the file/directory
- Size — file/directory size (in bytes)
- Attributes — permissions set for the file/directory in the operating system
- Owner — owner of the file/directory
- Group — group the file/directory is assigned to
- Change date — date when the file/directory was last modified
View a file/directory
To navigate the file system:
- Double-click the directory name to view a directory.
- Double-click the
 Back button on the toolbar to return to the previous level.
 - Double-click the file name to view a file.
Create a new file/directory
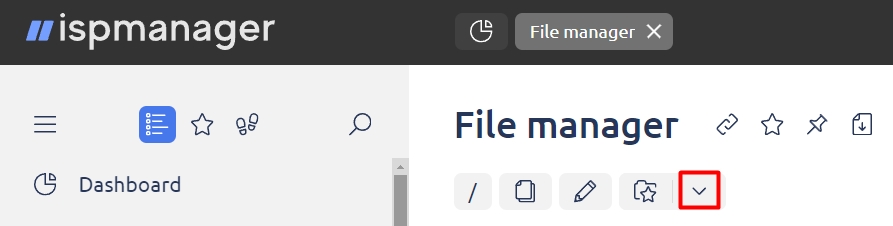
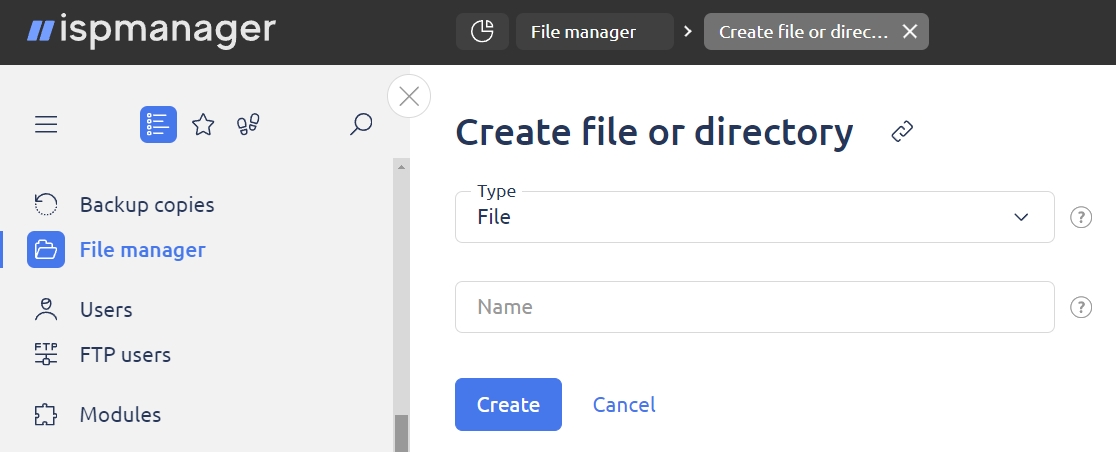
To create a new file/directory, click  on the toolbar and complete the fields in the form:
- Type — select File, Directory or Link. If you select Link, an additional field called Value will appear in the form
- Value — enter the name of the file or directory the symlink will point to
- Name — enter the name for the file or directory
View and edit a file
To view or edit a file, double-click or select it in the list, click  and select Open in the drop-down menu.
FileMaxEditSize — the parameter that defines the maximum size of a file that can be opened in the File Manager Editor. It is specified in KiB, the default value is 1024 KiB.
When you open .log and .log.gz log files, by default, the editor shows the last 50 lines of the log file in the read-only mode.
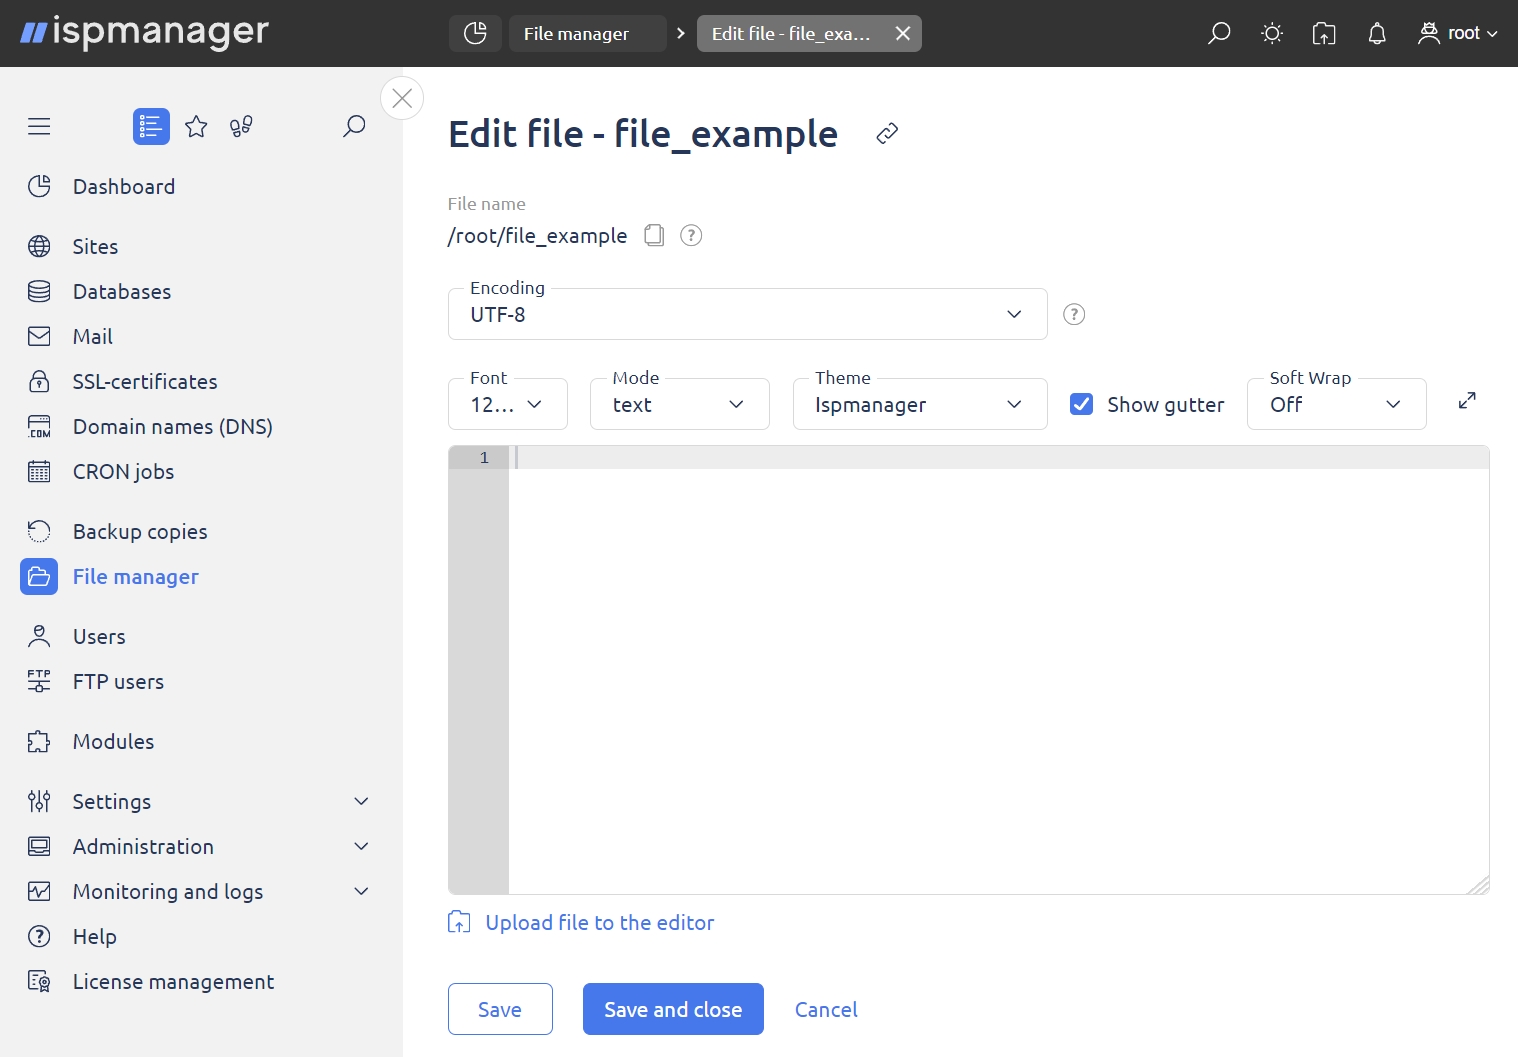
To open a file in required encoding, select the encoding in the corresponding field.
Changing the file encoding will again upload its contents into the text editor (re-encoded into the encoding you selected). All the unsaved changes that you made in the editor before selecting new encoding, will be lost!
ispmanager 6 uses Ace as the basis for its file editor. To change the interface of the editor, you can set the font size (Font), theme (Theme), syntax highlighting (Mode), line wrapping (Soft Wrap) and enable line numbering (Show gutter). Automatic line wrapping will not add any wrap symbols into the file that you are editing.
A brief description of Ace shortcuts:
| Windows/Linux | Mac | Action |
| Ctrl+Shift+U | Ctrl+Shift+U | Change to lower case |
| Ctrl+U | Ctrl+U | Change to upper case |
| Shift+(Up/Down/Left/Right/ Home/End/PgUp/PgDown) | Shift+(Up/Down/Left/Right/ Home/End/PgUp/PgDown) | Select text |
| Ctrl+A | Command+A | Select all |
| Ctrl+Shift+D | Command+Shift+D | Duplicate selection |
| Ctrl+F | Command+F | Find |
| Ctrl+K | Command+G | Find next |
| Ctrl+Shift+K | Command+Shift+G | Find previous |
| Ctrl+H | Command+Option+F | Find and replace |
| Ctrl+Shift+R | Command+Option+Shift+F | Find and replace all |
| Alt+L, Ctrl+F1 | Command+Option+L, Command+F1 | Fold selection |
| Alt+Shift+L, Ctrl+Shift+F1 | Command+Option+Shift+L, Command+Shift+F1 | Unfold selection |
| Left, Right, Up, Down, Home, End, PgUp, PgDown | Ctrl+B, Ctrl+F, Ctrl+P, Ctrl+N, Ctrl+A, Ctrl+E, Option+PageUp, Option+PageDown | Go to |
| Ctrl+End | Command+End, Command+Down | Go to end |
| Ctrl+Home | Command+Home | Go to start |
| Ctrl+L | Command+L | Go to line |
| Ctrl+P | Go to matching bracket | |
| Ctrl+Left | Option+Left | Go to word left |
| Ctrl+Right | Option+Right | Go to word right |
| Tab | Tab | Indent |
| Shift+Tab | Shift+Tab | Outdent |
| Ctrl+Alt+E | Command+Option+E | Macros recording |
| Ctrl+Shift+E | Command+Shift+E | Macros replay |
| Alt+Down | Option+Down | Move lines down |
| Alt+Up | Option+Up | Move lines up |
| Insert | Insert | Change insert mode/overwrite |
| Ctrl+Z, | Command+Z | Undo |
| Ctrl+Shift+Z, Ctrl+Y | Command+Shift+Z, Command+Y | Redo |
| Ctrl+D | Command+D | Delete line |
| Alt+Delete | Ctrl+K | Remove to line end |
| Alt+Backspace | Command+Backspace | Remove to line start |
| Ctrl+Backspace | Option+Backspace, Ctrl+Option+Backspace | Remove word left |
| Ctrl+Delete | Option+Delete | Remove word right |
| Ctrl+/ | Command+/ | Comment/uncomment a line/selection (works in modes C/C++, C#, etc.) |
| Сtrl+S | Command+S | Save changes in the text editor. Used to edit files in File manager and Сonfiguration files in Websites. |
View an archive
File manager allows you to manage archives as regular directories. In case of problmes, make sure that the appropriate software is installed on your server, and the archive format corresponds to its extension.
To view an archive:
- Select the archive you want to view.
- Select Open catalogue in the
 drop-down menu.
 - This will open a table with all the same functions that are available for files and directories.
Change file/directory attributes
To edit file/directory attributes:
- Select a file/directory whose attributes you want to change in the list. To select multiple items, press and hold the Ctrl key.
- Click
 Attributes on the toolbar or select Attributes in the
  drop-down menu.
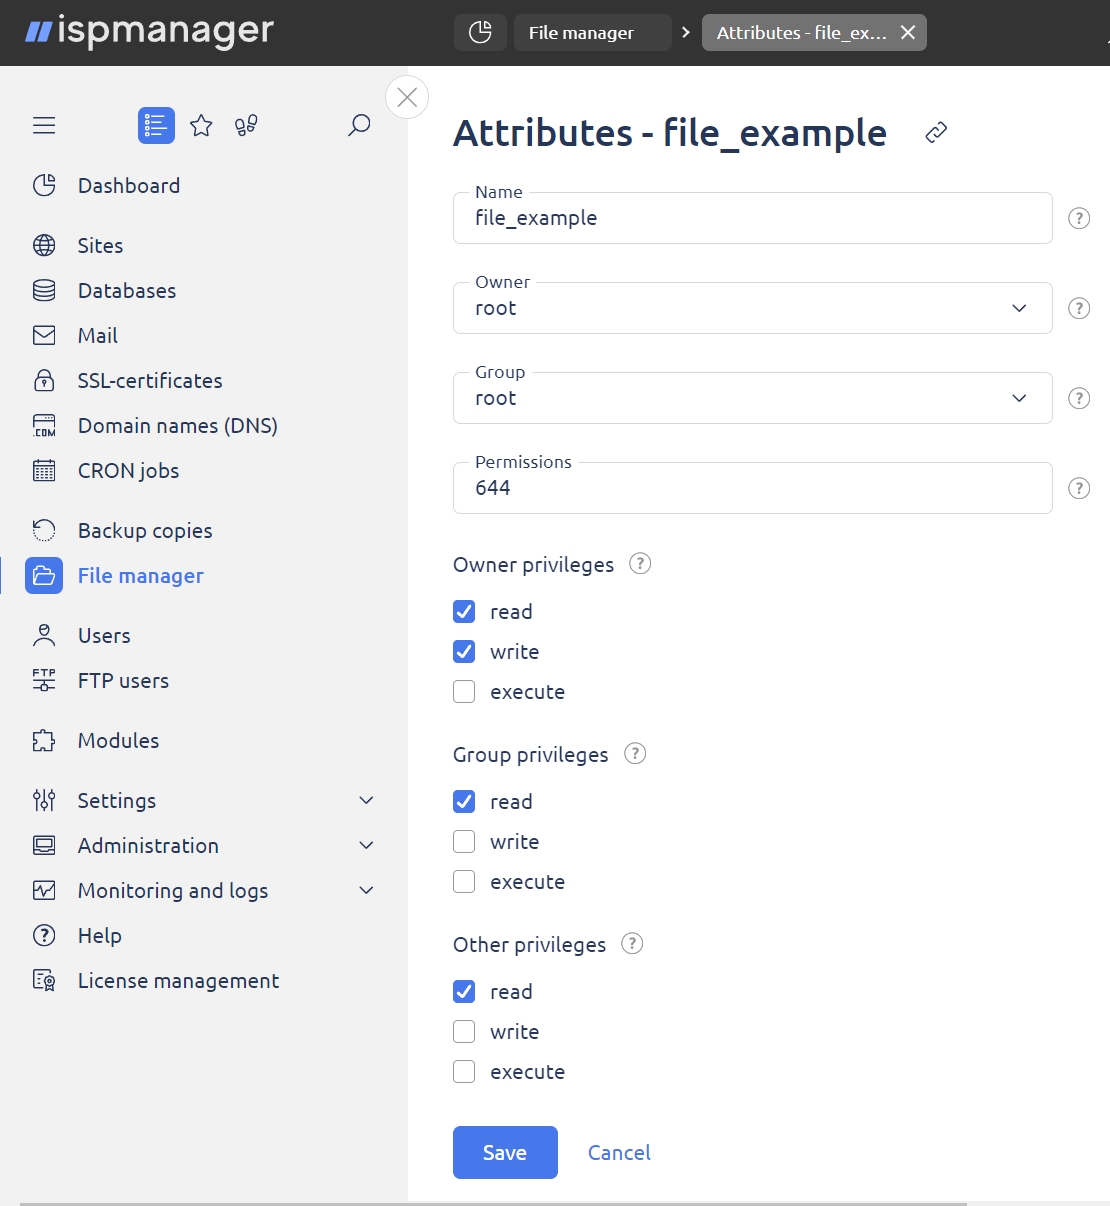
This will open a window with options:
- Name — enter the name of the file/directory
- Owner — select a user who owns this file/directory. Only a user with server administrator permissions can change this field
- Group — select a group that owns the file/directory. Only a user with server administrator permissions can change this field
- Change child elements — only for directories. By default, the changes do not apply to child files and directories. If you want to change the owner and/or access privileges for child elements, select an appropriate option from the drop-down menu
- Permissions — enter the permissions code as an octal mask. You can do this by hand or check the appropriate boxes below:
- Owner privileges — users who have the same UID (user identifier) as the user who owns the file/directory
- Group privileges — users included into the group that owns the file/directory
- Other privileges — all other users
There are three types of access permissions:
- Read — view or download (for files) or view the list of files and directories (for directories)
- Write — edit the content (for files) or add or remove items (for directories)
- Execute — run (for files) or access the content (for directories). Unlike the read permission, execute doesn't allow you to get the list of files and directories for a directory
Copy or move a file/directory
To copy or move a file/directory:
- Select the file/directory you want to copy or move in the list. To select multiple items, press and hold the Ctrl key.
- Click
 on the toolbar or select Copy in the
  drop-down menu.
This will open a window with options:
- Move files — check this box to move files/directories to a selected directory
- Overwrite — check this box to overwrite a file/directory and directory content
- Open the selected directory — check this box to go to the selected directory after the files/directories are copied or moved
Extract files/directories from an archive
To extract files and directories from an archive:
- Select the archive you want to extract files/directories from in the list. To select multiple items, press and hold the Ctrl key.
- Click
 Archive and then
  Extract on the toolbar or select Extract in the
  drop-down menu.
This will open a window with options:
- To directory — select a directory where you want to extract the files/directories from the archive(s)
- Create a directory — if you want to extract to a non-existent directory, provide the path to that directory. For example, if you want to extract a file to directory "/22/content", select directory "22" in the tree and enter "content" into the Create a directory field
- Open the selected directory — check this box to go to the selected directory after the files/directories are extracted
If you need to extract only some files, open the archive as a regular directory, select the files you want to extract and use the copy or move function for files and directories.
Archive a file/directory
To archive a file/directory:
- Select the file/directory you want to archive in the list. To select multiple items, press and hold the Ctrl key.
- Click
 Archive and then
  Create on the toolbar or select Create in the
  drop-down menu.
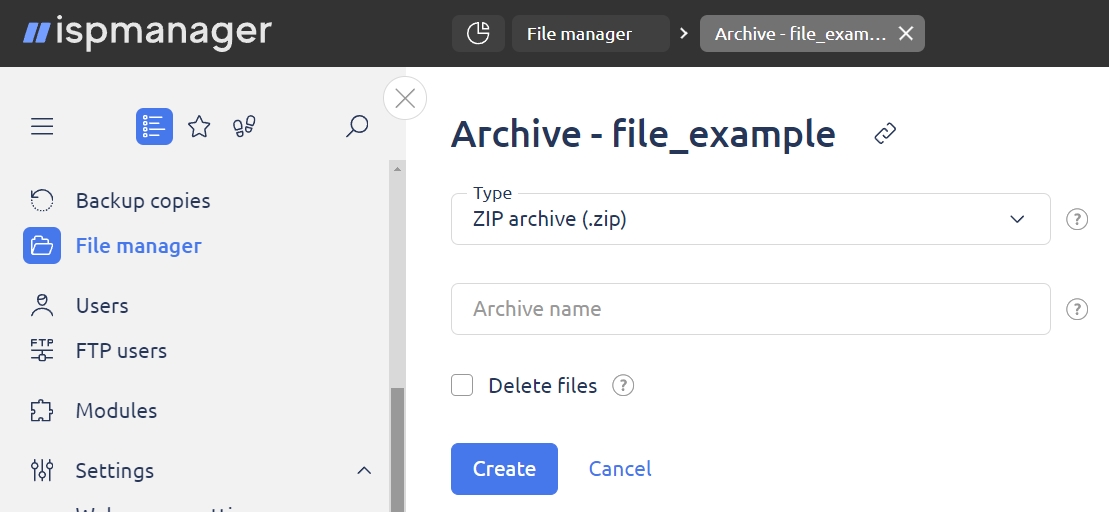
This will open a window with options:
- Type — select the archive type from the list
- Archive name — enter the name for the archive (without extension)
- Delete files — check this box to delete the files or directories once they are archived
The archive with all selected files and directories will be created in the current directory.
Download a file/directory
If a disk limit is set for the user, they won't be able to download all the files at once if their files+archive size exceeds the quota.
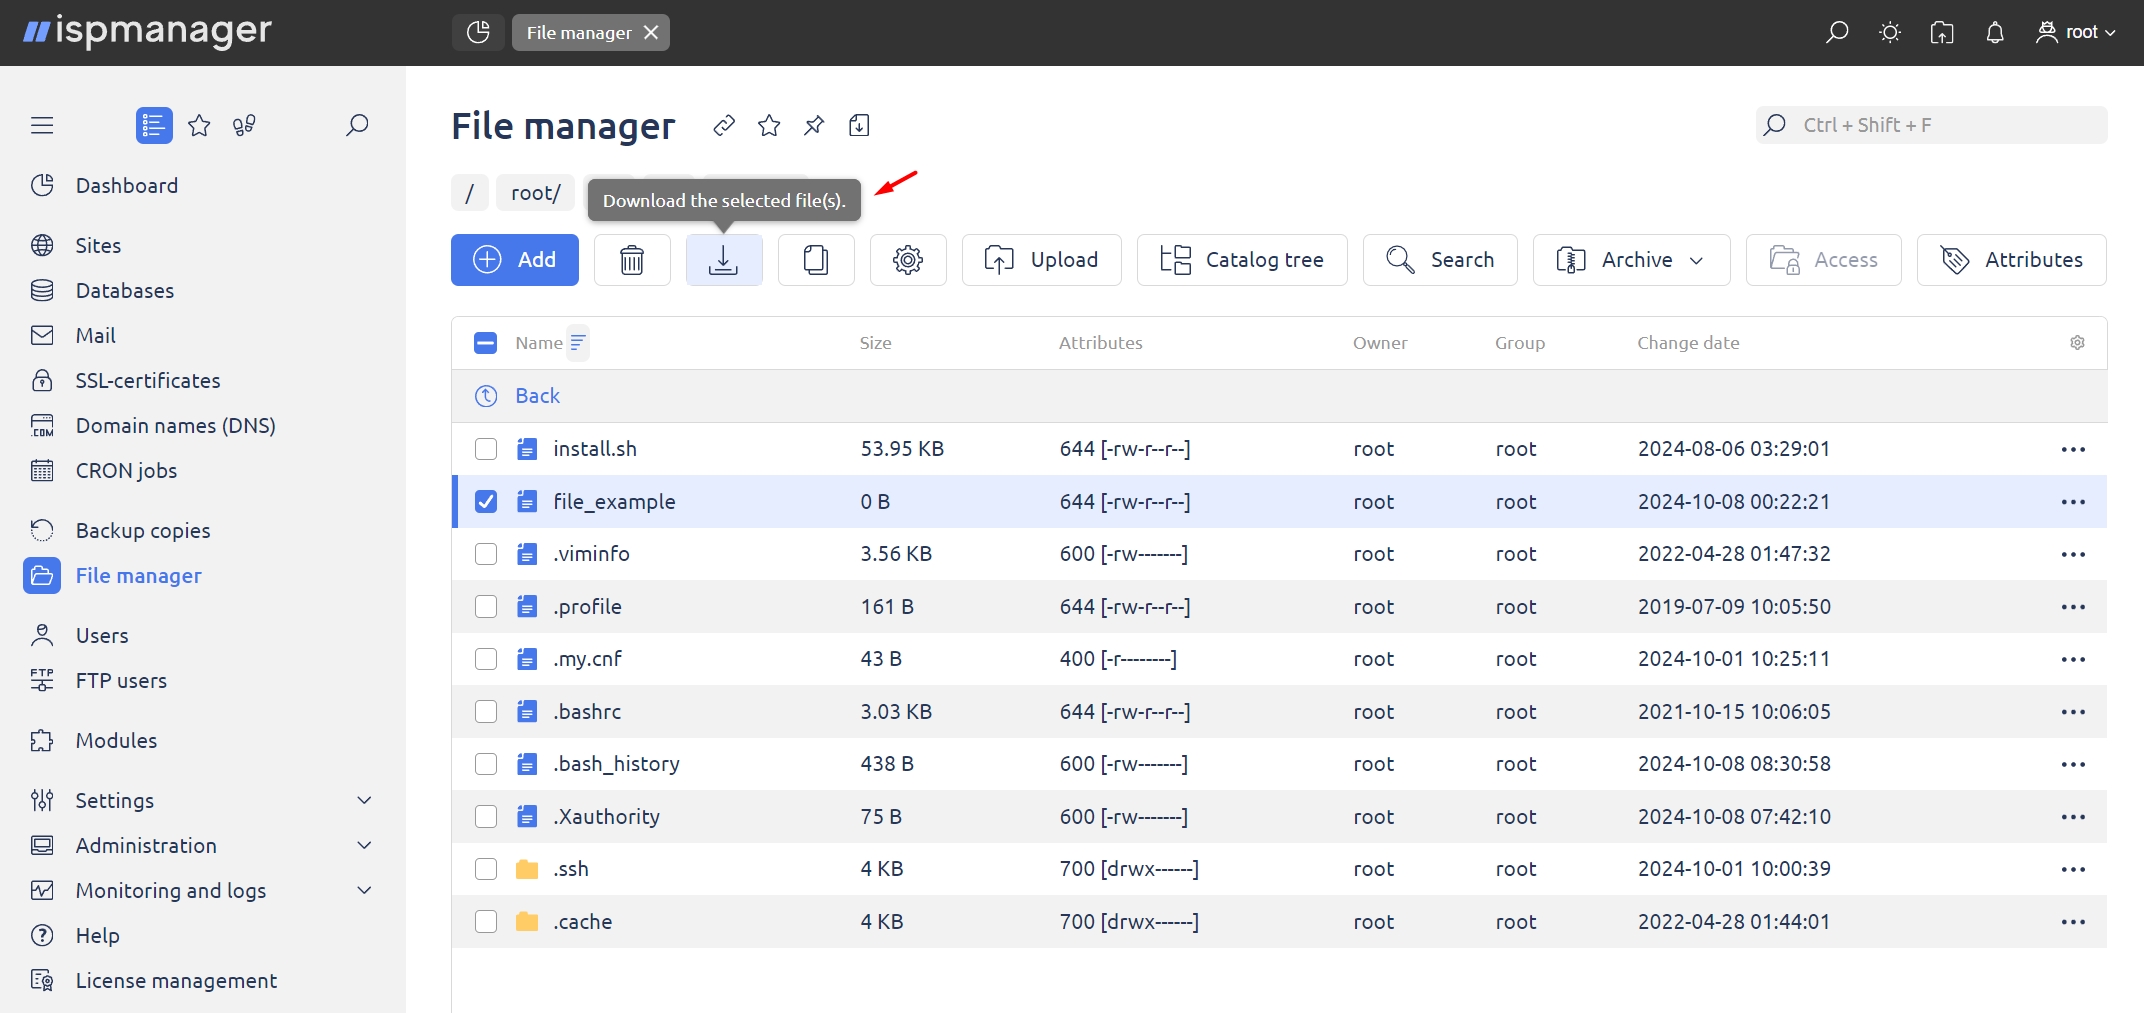
To download a file/directory from the server:
- Select the file/directory you want to download in the list. To select multiple items, press and hold the Ctrl key.
- Click
 on the toolbar.
This will copy the files/directories to your device.
How to download a backup from a remote FTP server:
- A temporary file is downloaded from the back-up server to the
/usr/local/mgr5/var/backup/ispmgr/directory on the server where ispmanager is installed. - The file becomes available for download, and the temporary file is deleted after one hour.
How to download multiple files/directories:
If you selected multiple files/directories, an archive will be created and downloaded.
- If you have superuser (root) permissions: the archive is created in the system tmp (usually in
/usr/local/mgr5/tmp/.filemgr-tmp/root/) - If you have user permissions: the archive is created in the user tmp (usually in
/usr/local/mgr5/tmp/.filemgr-tmp/имя_пользователя/)
The archive is deleted after you download it.
Upload a file
If you upload files to the server with user permissions and a disk quota is set for that user, make sure the user has enough disk space (twice as much as the file size) for upload.
To upload a file to the server, click  Upload on the toolbar.
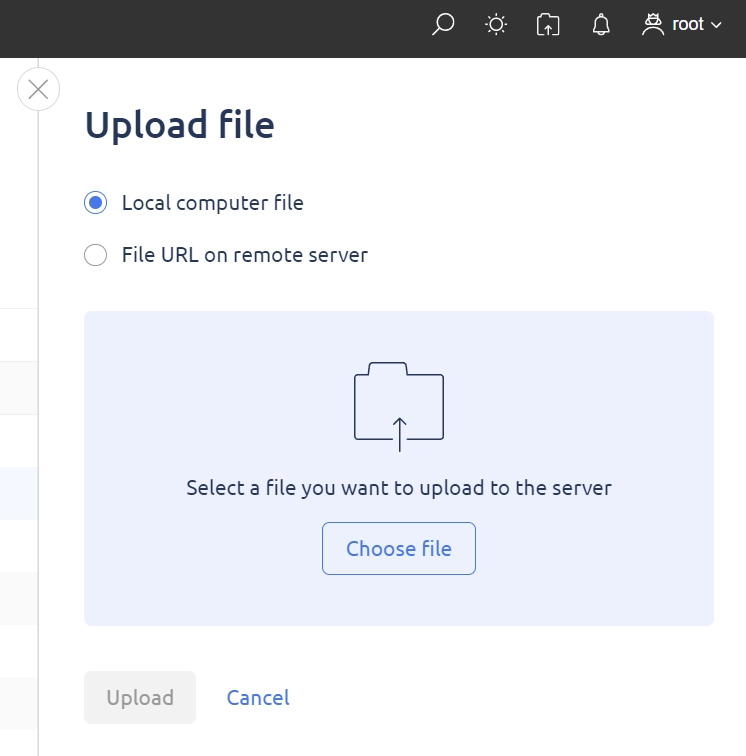
This will open a window with options:
Local computer file
Select a file you want to upload from the local computer to the current directory on the server. Use the Choose file button to find the file. To select multiple files, press and hold the Shift or Ctrl key.
- File URL on remote server.
- URL — enter the URL to the file you want to upload to the current directory, for example: http://example.com/dir/file.html
- File name — enter the name for your file.
Move between catalogs
To go to a catalog:
- Click
 Catalog tree on the toolbar.
 - Select the directory you want to go to and click Go to.
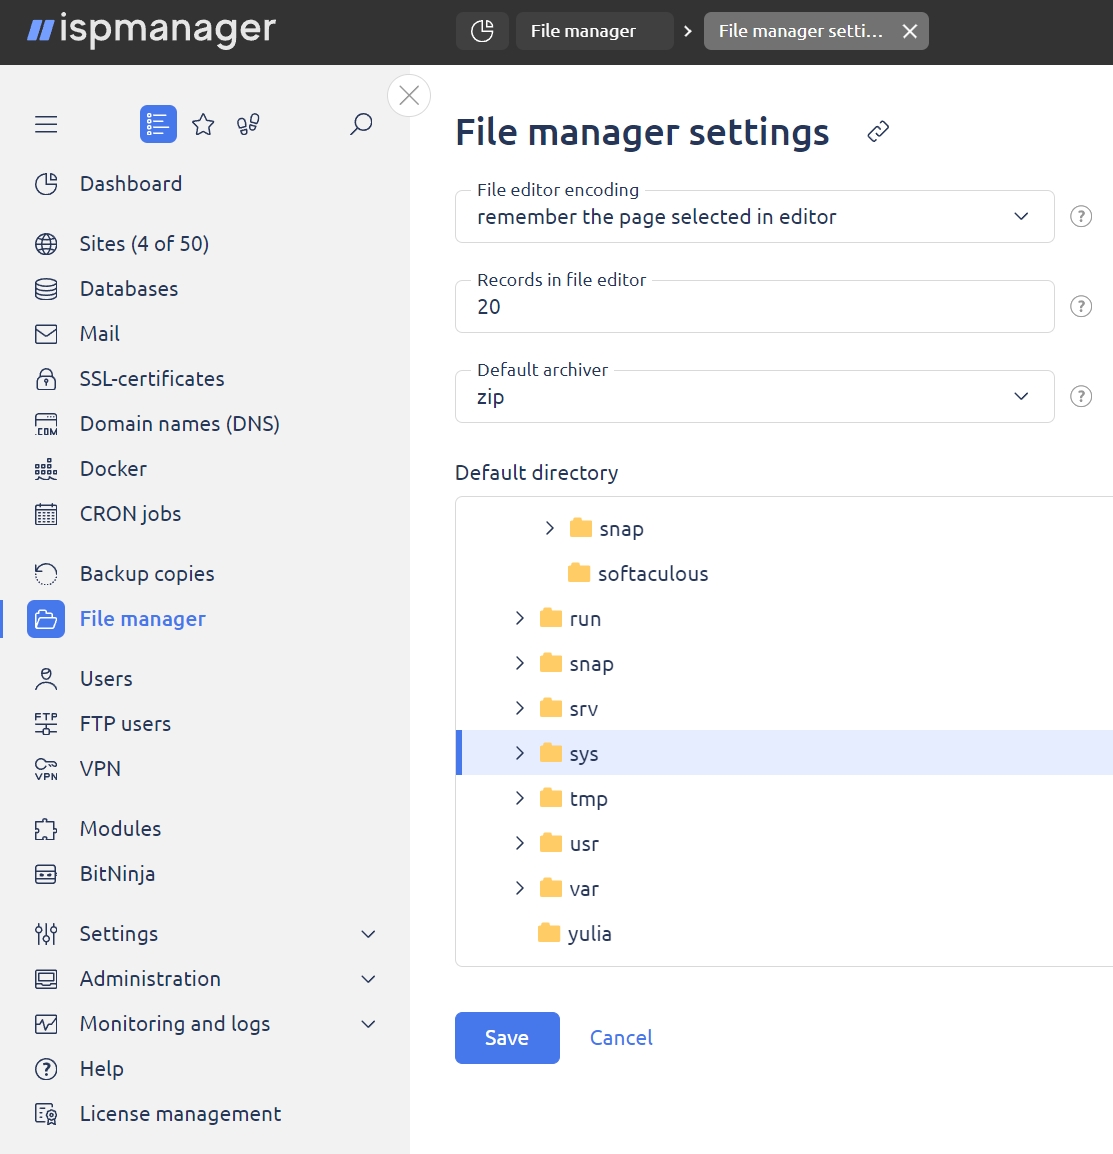
File manager settings
To view and edit the properties of the file manager, click  on the toolbar.
This will open a window with options:
- File editor code page — select a code page that will be used by default by the file editor
- Records in file editor — select the approximate height of the file editor window in lines. Possible values are 5–100. The actual number of lines in the window may vary depending on the selected font size
- Default archiver — select an archiver that will be used by default when uploading directories or groups of files. The recommended option is zip
- Default directory — select a directory where files will be saved by default
Add a directory to favorites
To add a directory to favorites:
- Go to a directory you want to add to favorites.
- Click
 on the toolbar.
Now, to move to your favorite directory quickly, all you have to do is select it from the list of favorite paths.