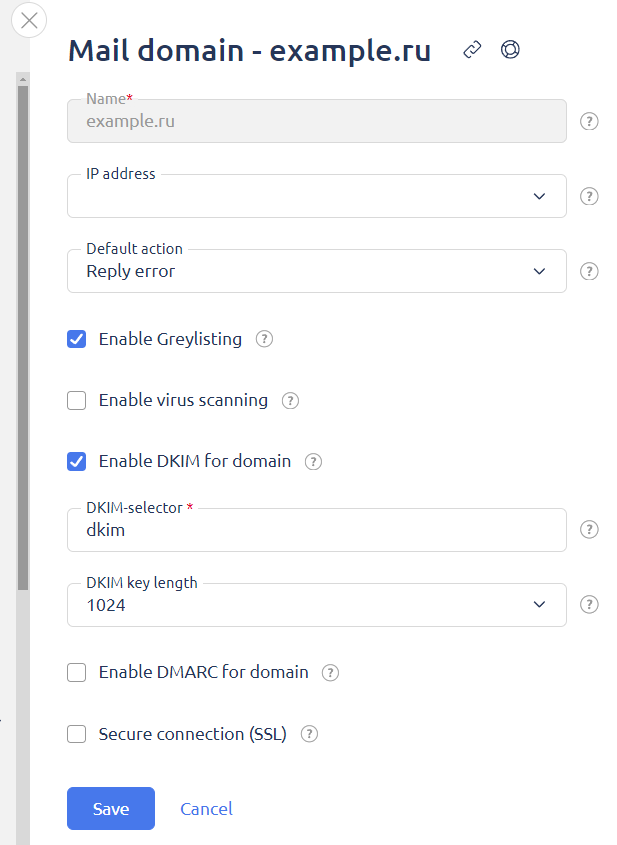
Mail domain configuration
Introduction
This section provides a detailed description of how to set up a mail domain.
Create a mail domain
If a mail domain has not yet been created, create one.
How to work with mailboxes
In the Main Menu choose Mail → Edit → Mail clients settings.

- The Roundcube web interface can be accessed via: https://server IP address/roundcube.
- From the control panel choose Mail section - select the mailbox that you want to use - click Open the mail web client button.

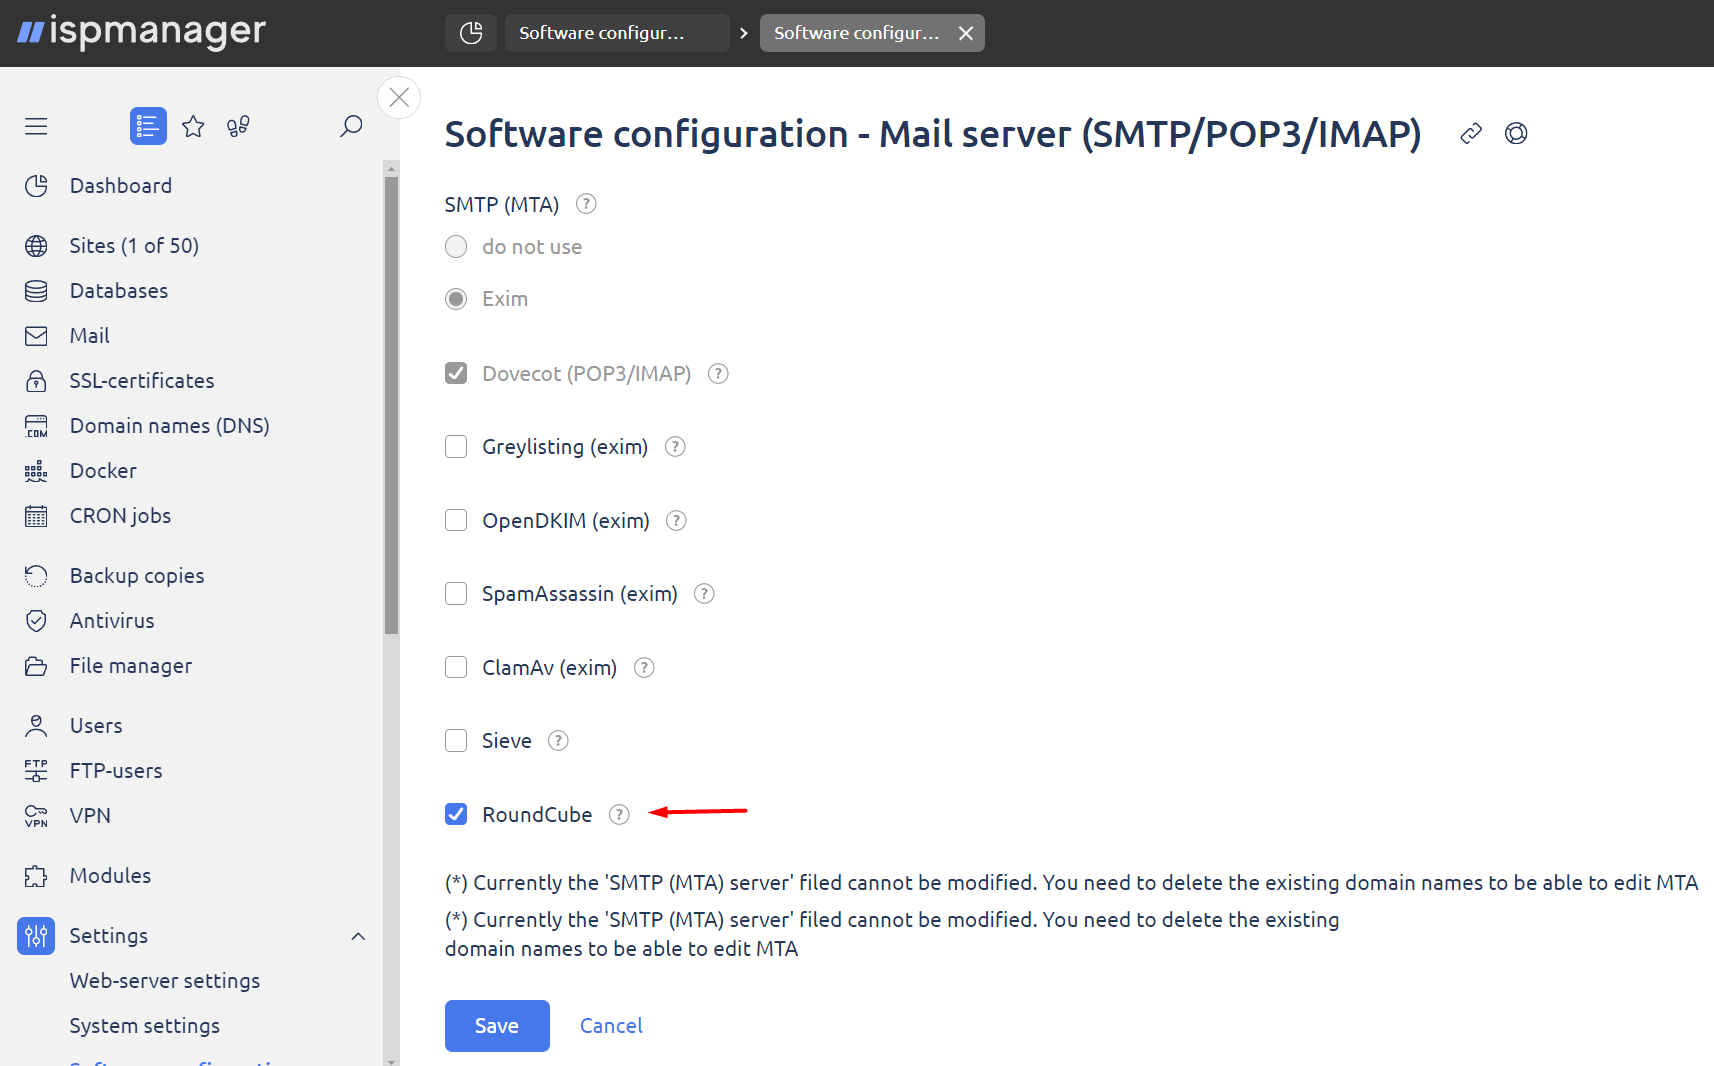
If the web interface is not available from https://server IP address/roundcube or the Open web mail client button is missing, you can install it from Settings → Software configuration → choose Mail server (SMTP/POP3/IMAP) → Edit button.
Check Roundcube, apply changes and wait for Roundcube to install.
Spam protection
Spam protection is an email filtering system designed to detect and block unwanted messages, such as junk mail and scams.
There are two main levels of anti-spam protection implemented on the email server.
- Protection at the stage of receiving by the mail server - at this stage, spam emails are not allowed to be downloaded to the server. This prevents unwanted messages from contaminating your mailbox at the very beginning of the process.
- Spam filtering on arrival - After an email is uploaded to the server, it is analyzed in order to determine what to do with it. Depending on the detected signs of spam, the email can be sent to the Inbox or to the Recycle bin.
ispmanager panel has built-in anti-spam features.
- Greylisting;
- ClamAv.
Greylisting - is a spam filtering method based on a time delay in receiving emails. This mechanism temporarily rejects incoming messages and require a second attempt to send them. In the Spam Filter section of the panel, under Whitelist (Greylisting), users can specify exceptions that allow certain senders to pass this type of check.

ClamAV -is a tool designed to detect malware in emails and files. Для эффективной работы In order for ClamAV to work effectively in the ispmanager control panel, users need to make additional settings in the System section of the Scheduler. These settings optimize scanning processes and provide reliable protection against malicious threats that may be hidden in emails or files received in the mail.
Activate the tools using Settings → Software configuration → Mail server (SMTP/POP3/IMAP) → Edit (or double-click on the line).
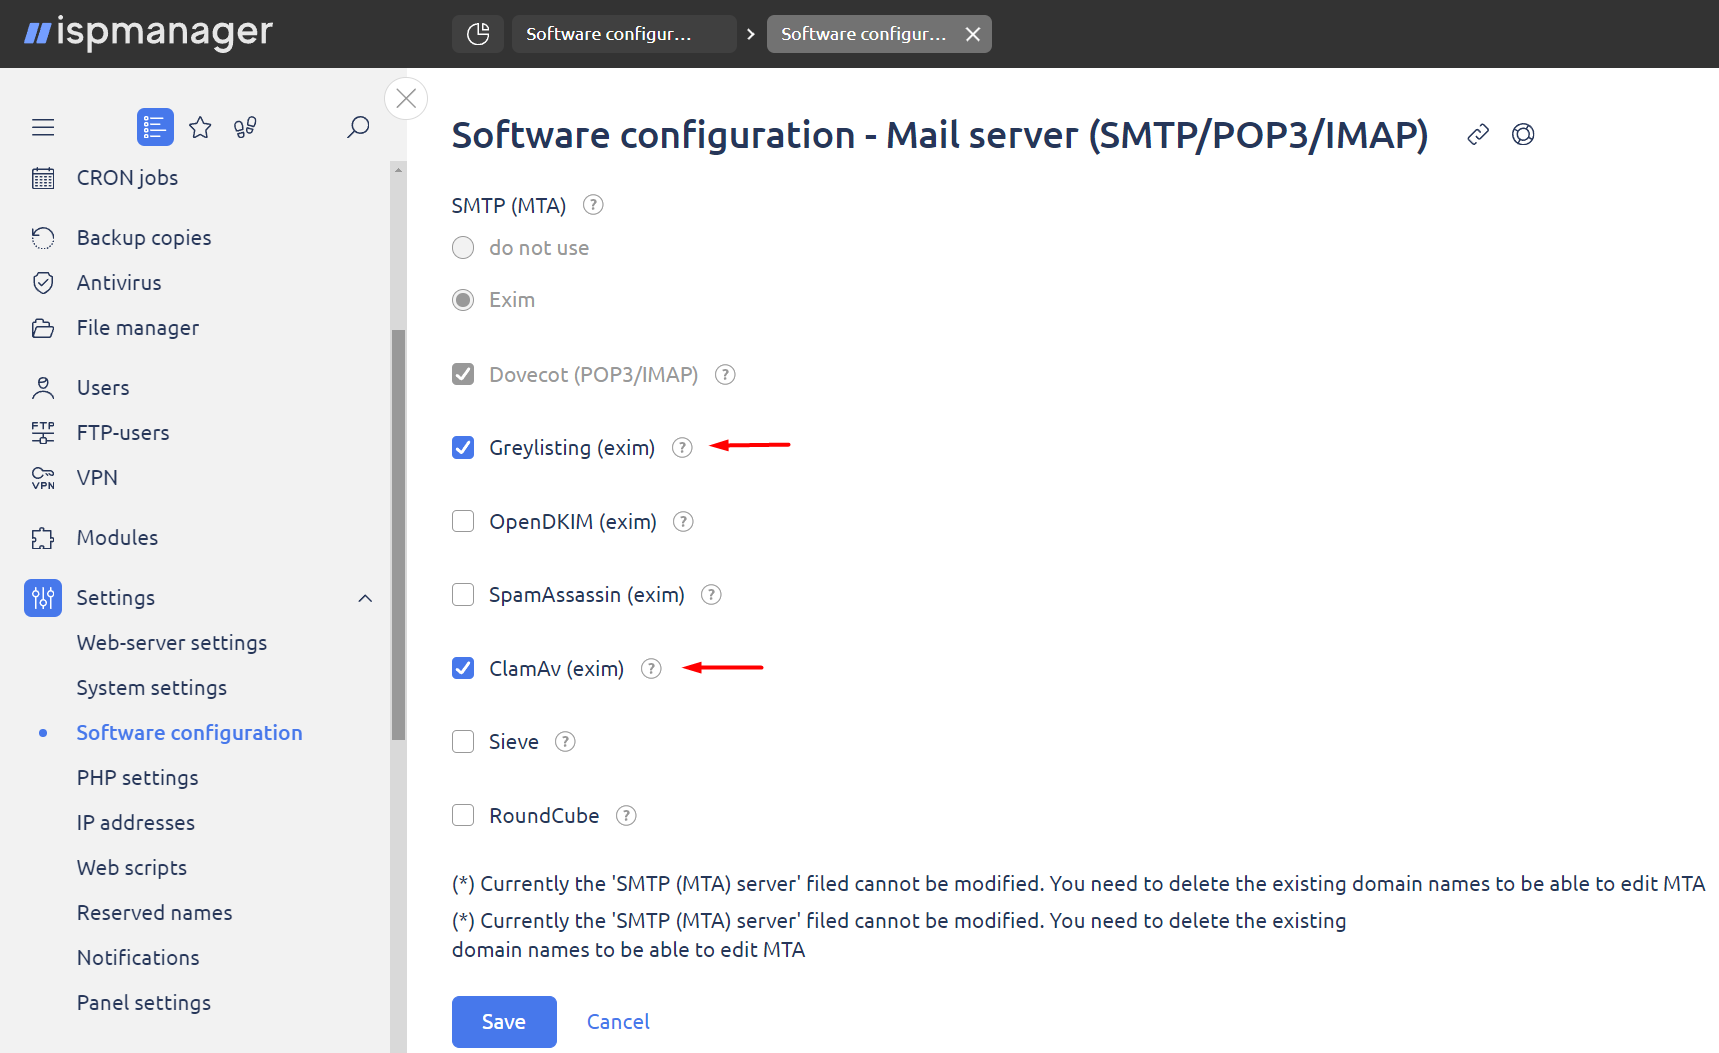
Click Save. The installation process will start.
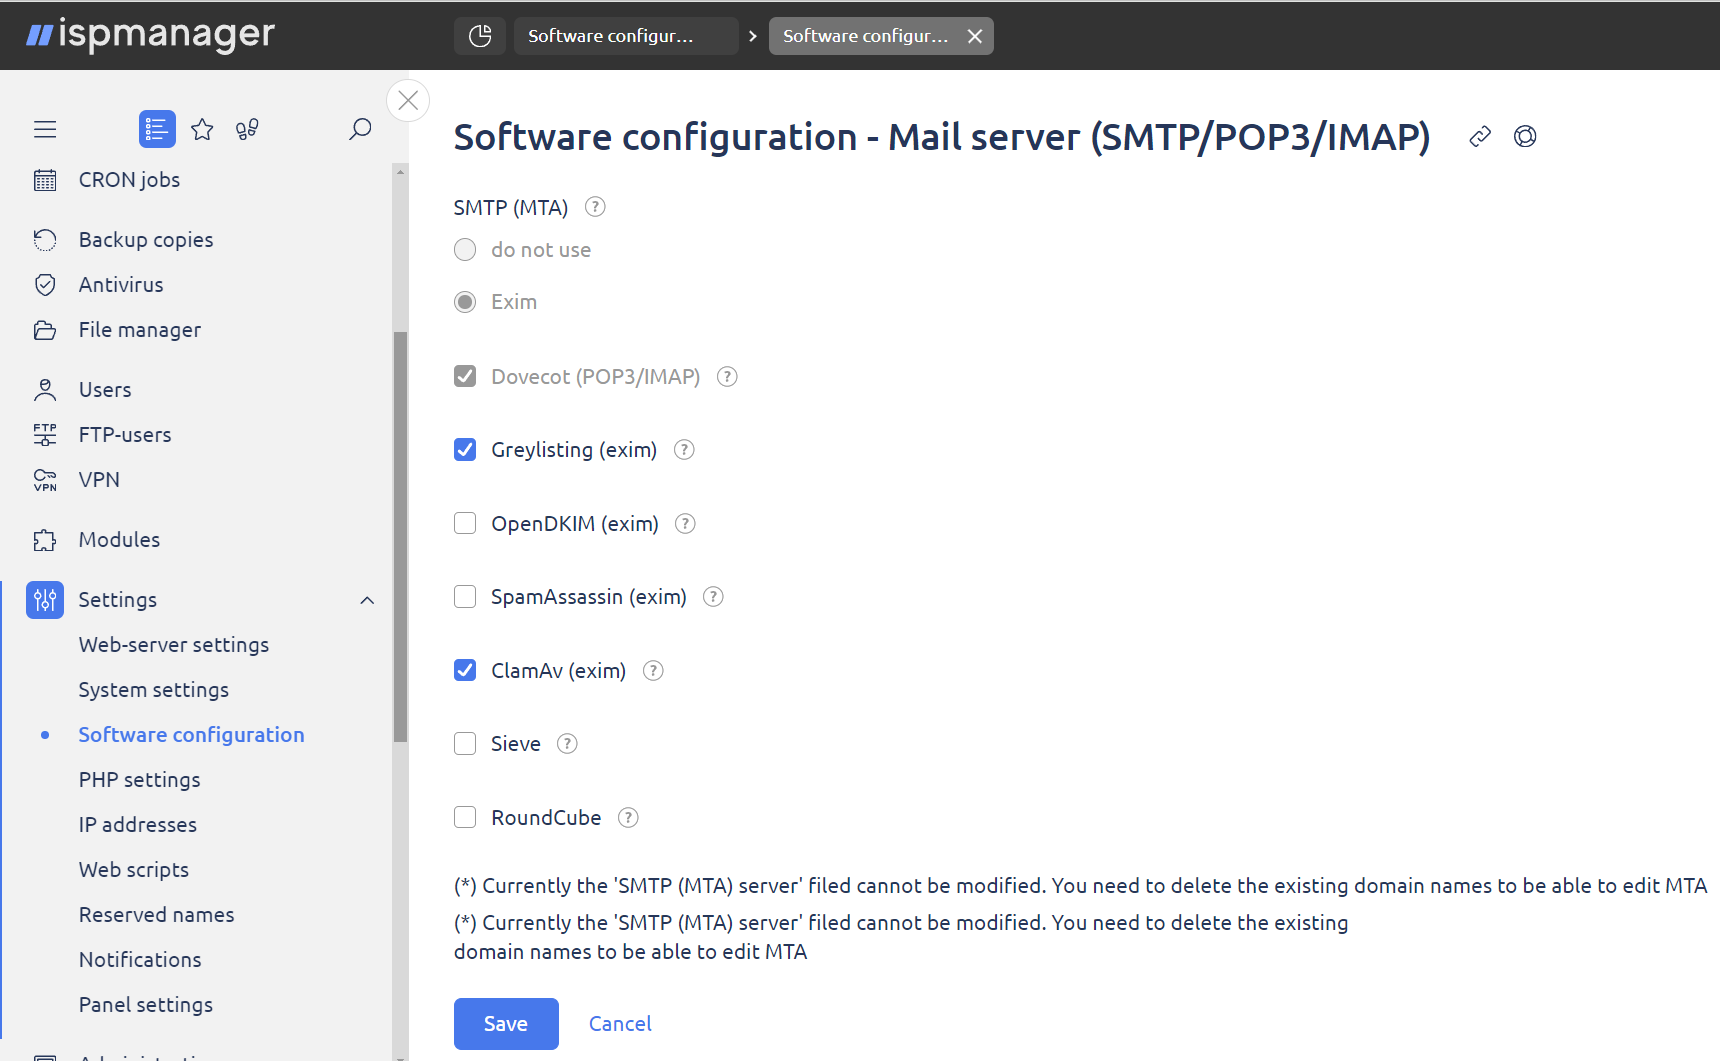
The installation will take several minutes.
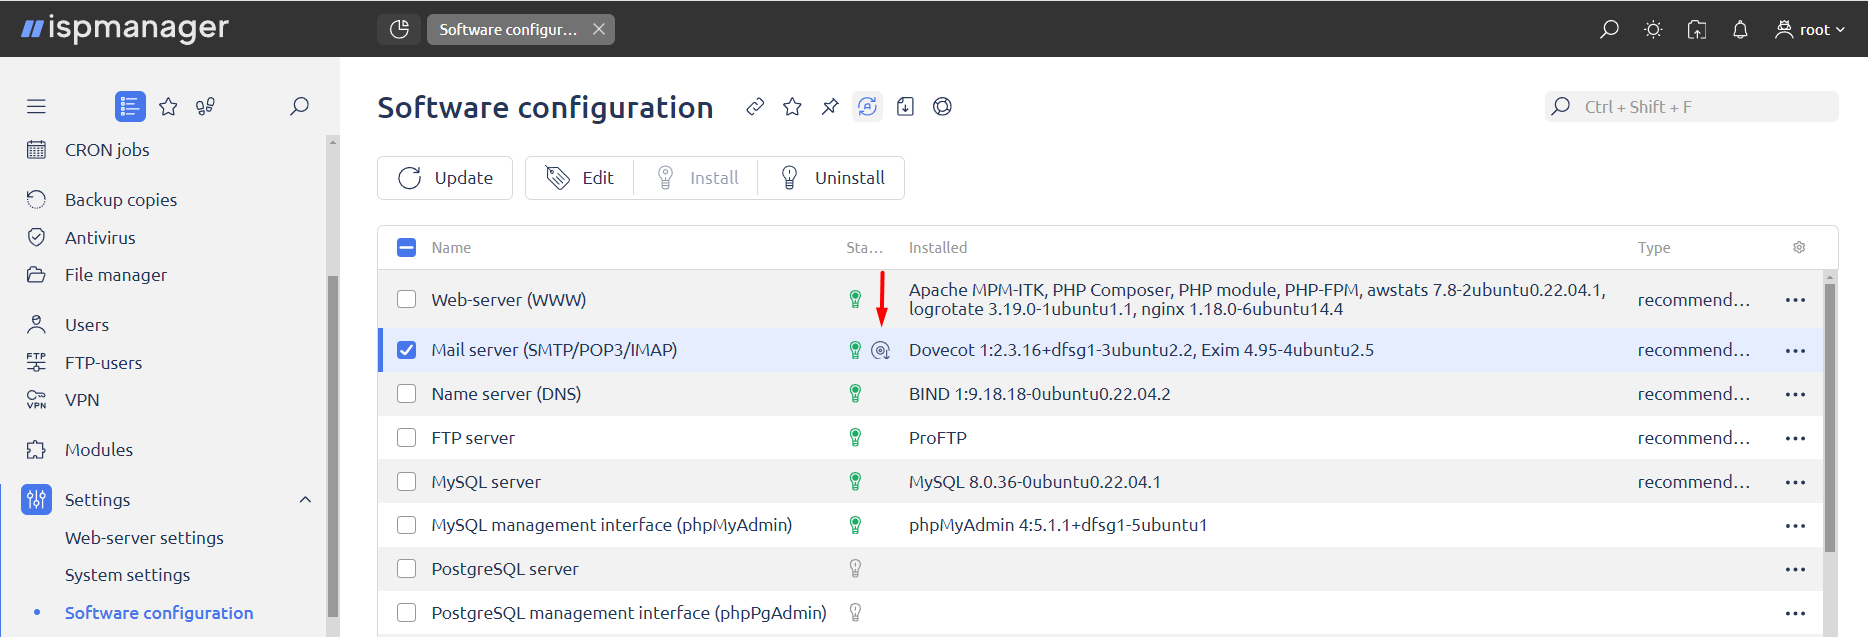
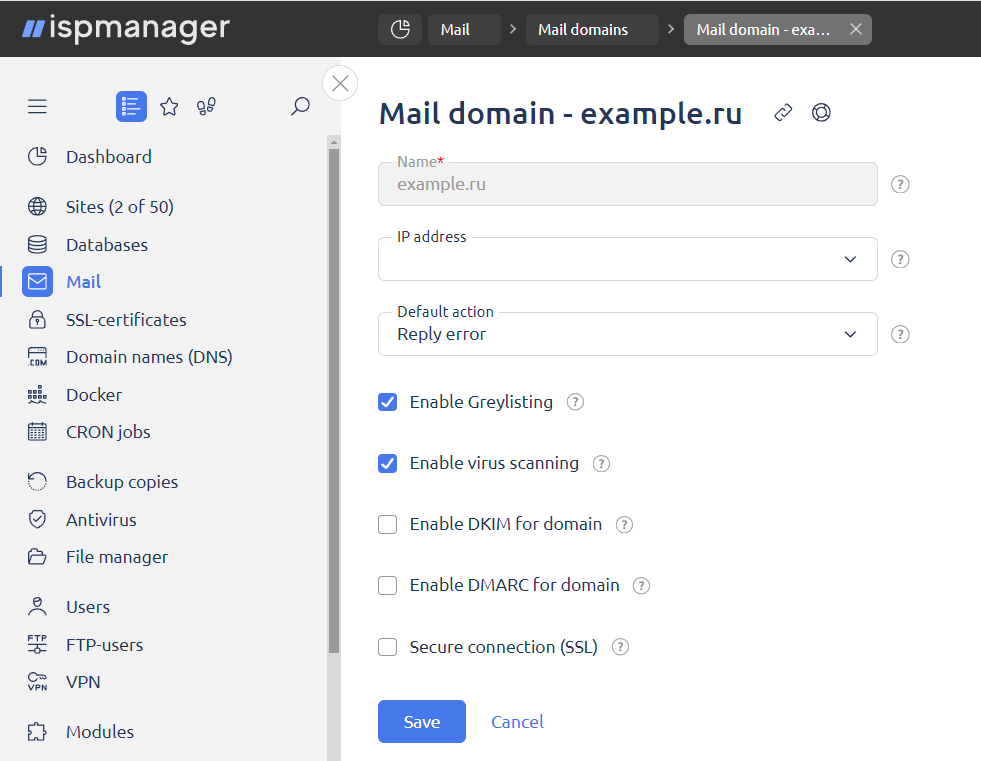
Once installed, set additional options. Main menu → Mail → Mail domains → Edit.

Select the checkboxes and click Save.
Blacklist
The ispmanager control panel provides convenient functionality for customizing mail filtering, allowing you to manage incoming messages based on blacklists and whitelists. An important feature is the use of blacklists. To add an address to the blacklist, follow the steps below. Open Main Menu → Mail → choose address → Spam filter → Blacklist.

Click Add.

Whitelist
Whitelisting, also known as greylisting, is an effective method of fighting spam. It works by temporarily delaying incoming mail. When a server receives an email from a whitelisted address, it automatically sends a message receipt error notification. Conscientious senders resend the message after some time, while spammers often ignore such notifications and continue sending to new addresses. The disadvantage of this method is the possible delay in email delivery from 15 minutes to 1 day, depending on the settings of the sending server.
How to add an address to Whitelist using ispmanager:
1. Open ispmanager Main Menu.
2. Choose Mail.
3. Move cursor over Spam filter.
4. From the drop-down list, select Whitelist.
5. Click Add.
6. Specify the necessary parameters to add an address to the whitelist.
Incoming mail filtering based on blacklists:
1. Go to Spam filter.
2. Choose DNSBL.
3. Click Add.
4. Specify the blacklist name in the DNSBL domain field.
Email inbox filtering
SpamAssassin — is an email content analysis program that helps to mark already delivered messages. Based on special algorithms, this tool adds appropriate labels to email headers. You can set up filters in your email client to automatically move messages to the right folders.
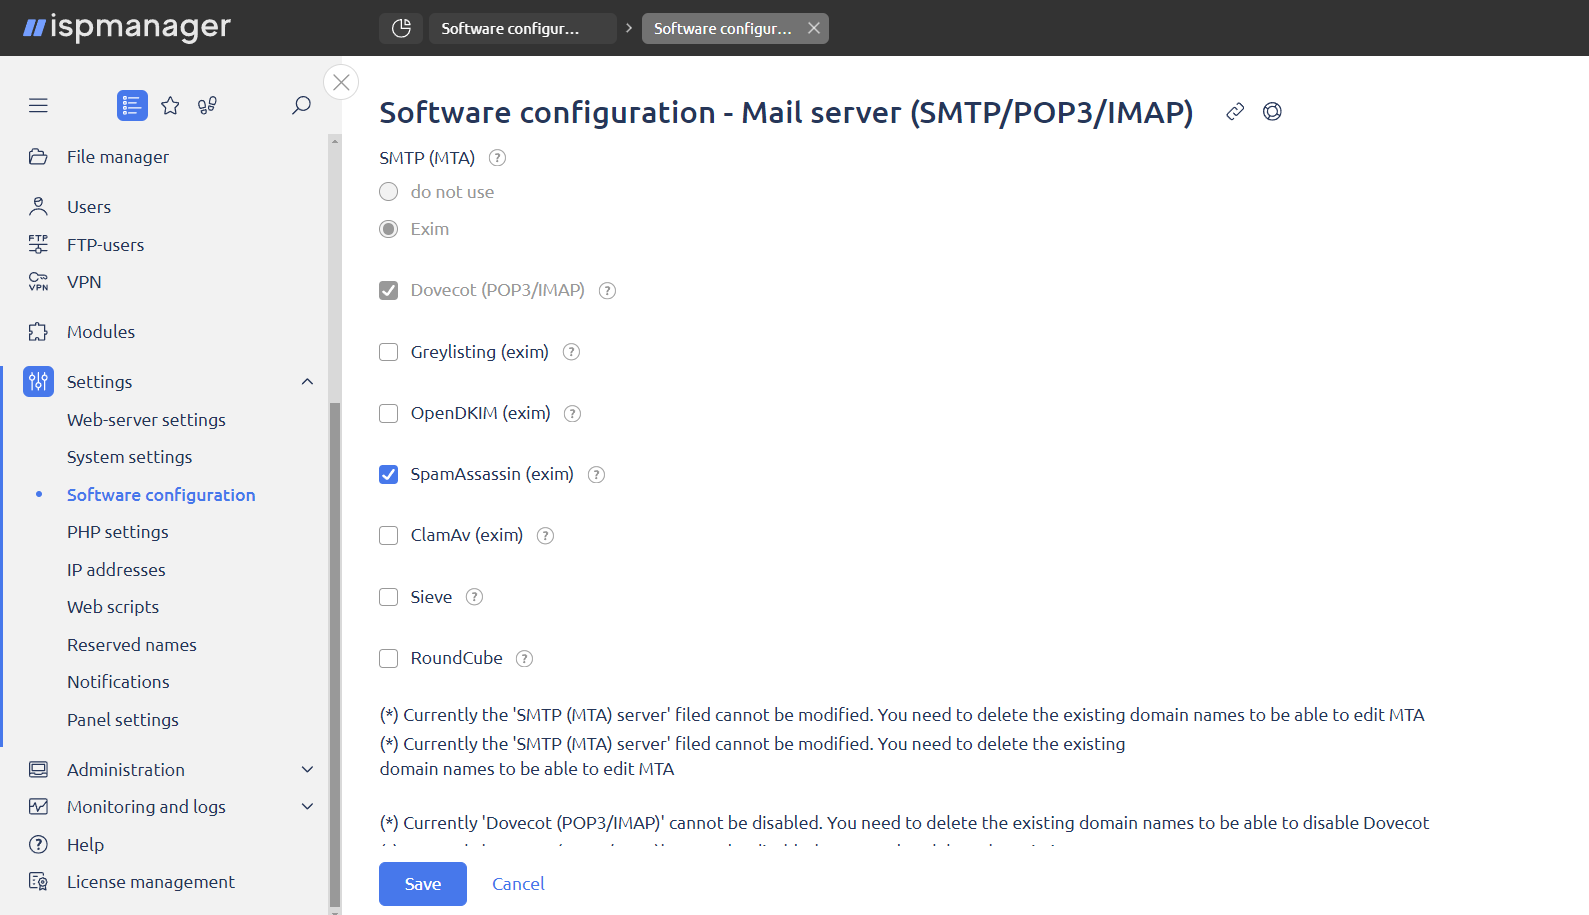
Enabling SpamAssassin on your mail server:
Go to Menu → Settings → Software configuration → select the mail server → Edit.

In the window that opens, check SpamAssassin and save your changes. The program will start working, and the spam detection algorithm will improve on its own over time..
Incoming mail verification
DKIM/DMARC - is used to protect domain names in email..
DKIM (DomainKeys Identified Mail) and DMARC (Domain-based Message Authentication, Reporting, and Conformance) - these are methods that help protect a domain name from spoofed emails by malicious users. They provide credibility to emails sent from the domain and help prevent them from being classified as spam.
The following steps are required in order to implement DKIM:
1. Install the OpenDKIM add-on module. This can be done in the same way as installing other components such as Roundcube..
2. Go to Settings → Software configuration.
3.Choose Mail server (SMTP/POP3/IMAP) and click Edit.
4. Enable OpenDKIM.
5. Apply the changes and wait for the installation to complete.
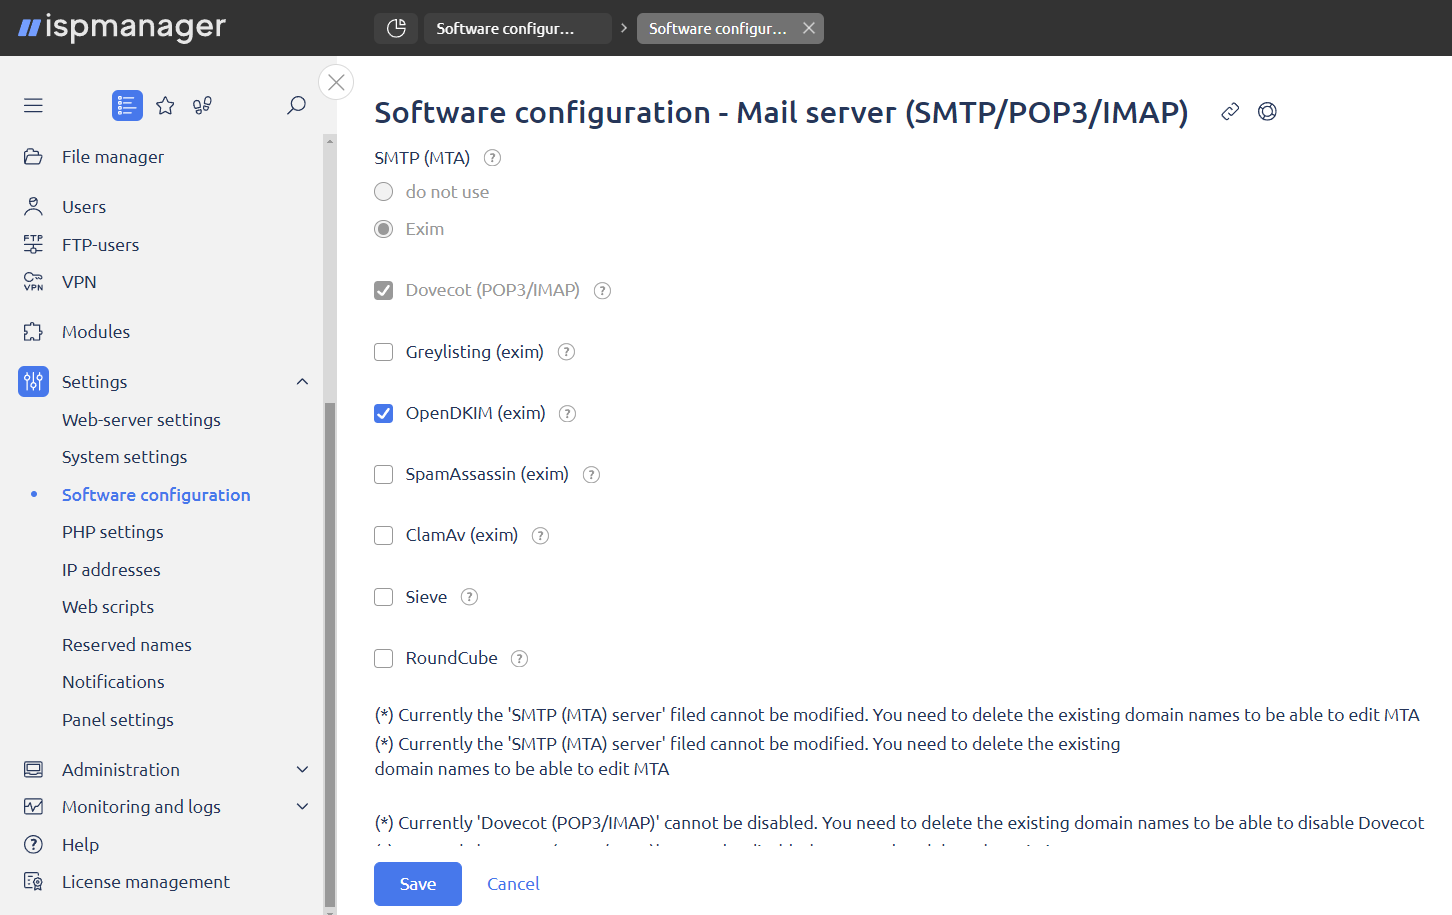
In the Mail section, after installing OpenDKIM, the Mail Domains will be available in the domain edit mode option . Enabling this option will enable OpenDKIM functionality for this domain. In most cases, you can leave the default values.
