Hosting a site on a server with ispmanager
Why?
To self-host a website in the ispmanager 6 panel.
Instructions
Creating a user
The "www-root" user is the default in the panel and will be the site owner of all created sites, including those created under the "root" user. This user is often sufficient to administer one or a small number of sites. However, if you want to manage sites under different users and/or different restrictions, you will need to create new users.
To create a new user in the ispmanager 6 control panel, go to the “Users” section and click on the “Create User” button. In the new tab that opens, fill in the user information, configure restrictions and access, then click “Next”.
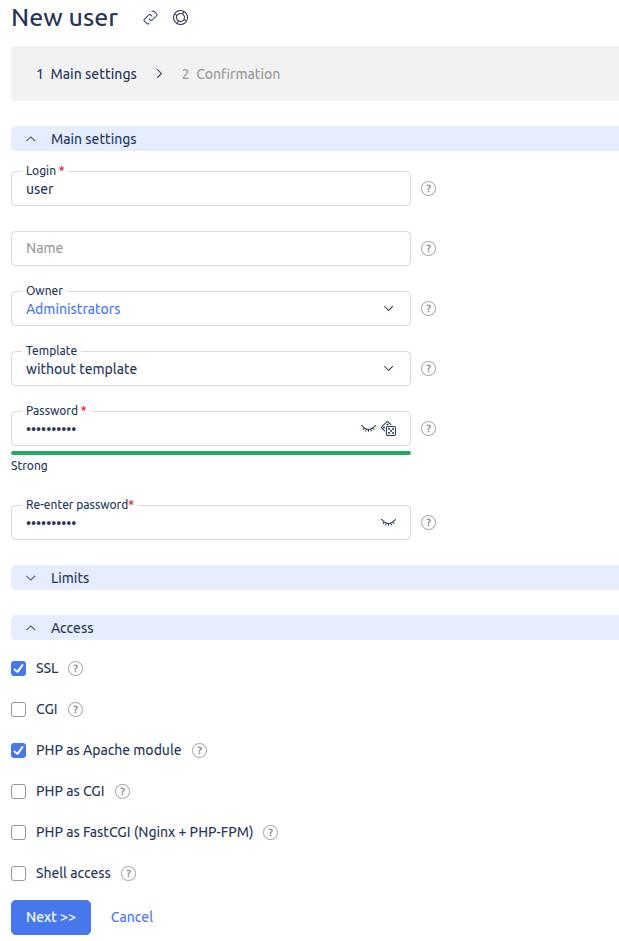
PLEASE NOTE!
For correct operation of the site it is recommended to allow the user to use SSL and PHP in one of the modes by selecting the necessary options in the “Access” tab.
At the “Additional Information” step, you can set and configure the objects that will be created automatically when you create a user: FTP user, site and email domain for the site.
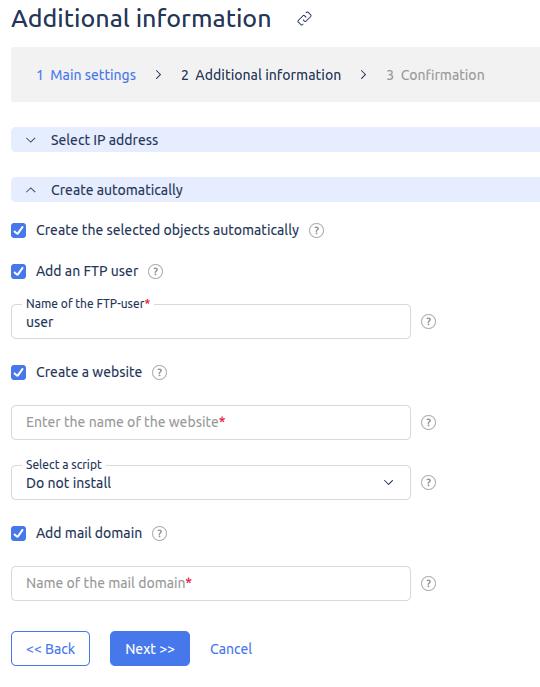
If you are not sure if you need these objects or if you need to customize them in more detail, uncheck the “Create the selected objects automatically” option.
Click the “Next” button and at the “Confirm” step check the data of the user to be created and click “Finish” if the data is correct.
Creating a site
To create a new site, go to the “Sites” section and click on the “Create a site” button. In the new tab, you can select the basic or advanced form of site creation.
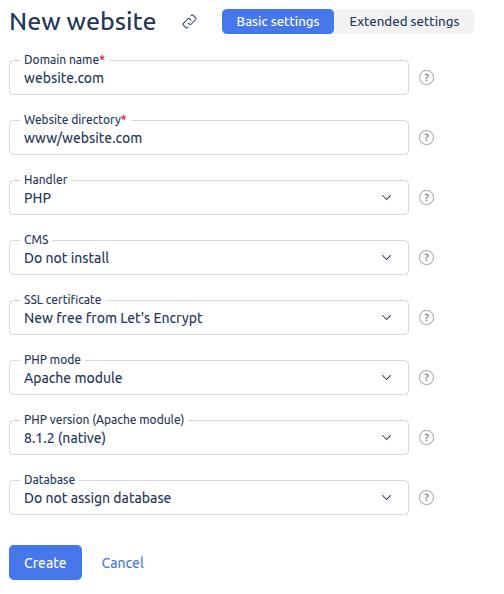
The basic form offers a quick website creation with basic parameters:
- Domain name;
- Home site directory;
- Hadler and its version;
- Web script for fast (automatic) CMS installation;
- SSL-certificate;
- Database in the panel the site is supposed to work with.
PLEASE NOTE!
By default, the site will be assigned to the user creating it.
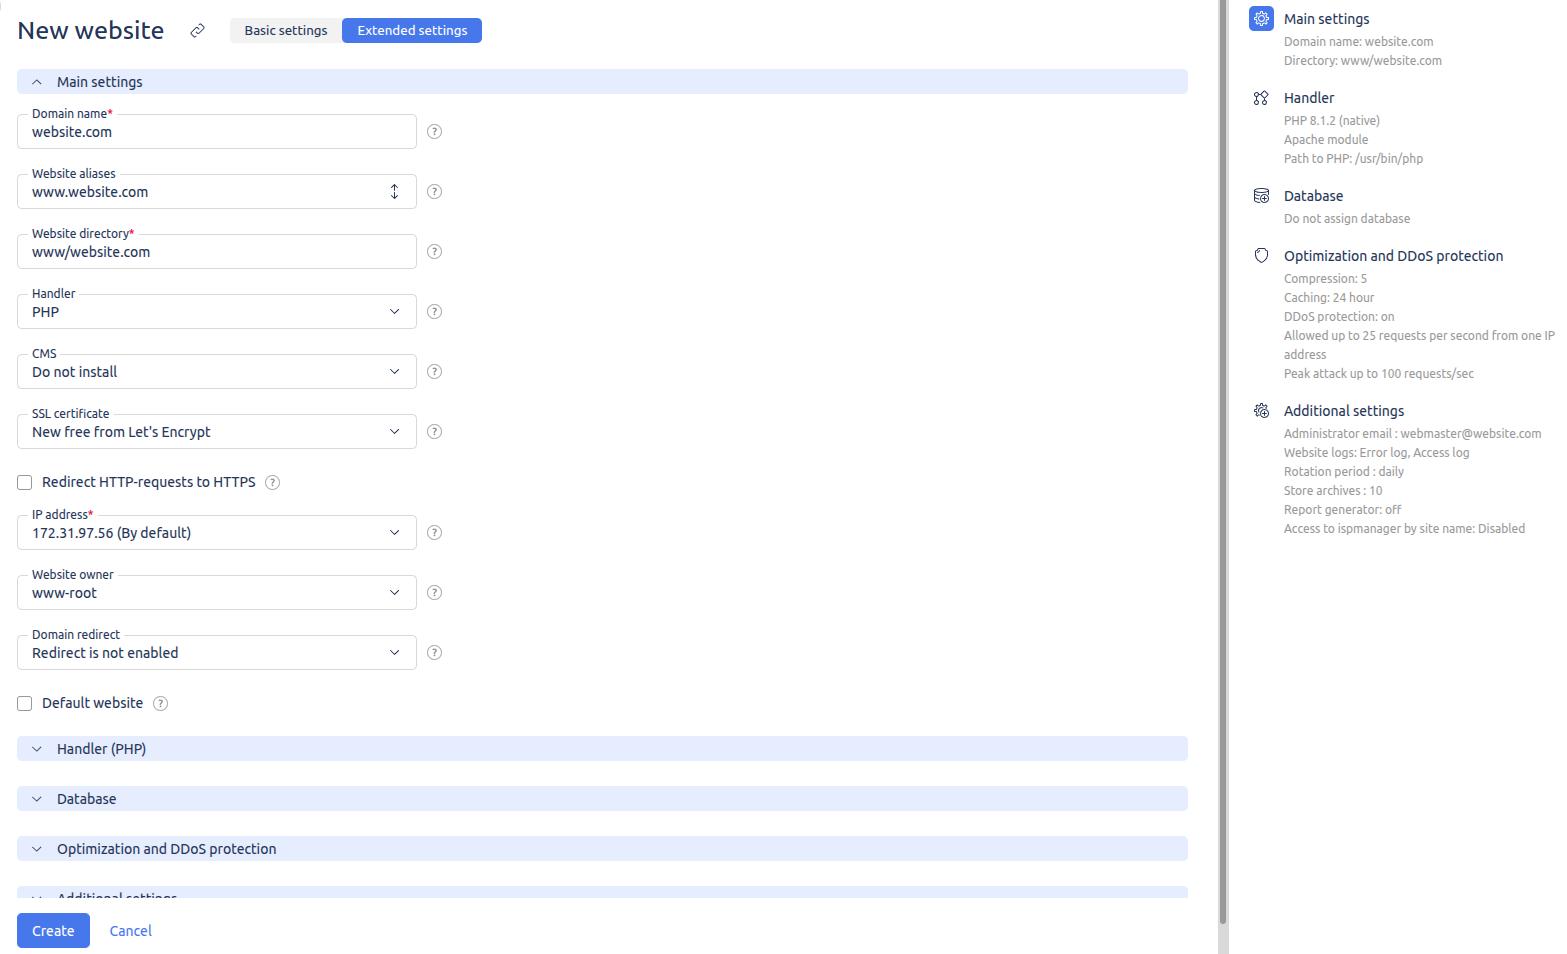
The extended form allows you to specify the following parameters in addition to the basic ones:
- Site aliases;
- Request redirection rules for HTTP and domains with “www”;
- Specific user-owner of the site;
- Optimization parameters;
- Parameters of protection against DDoS-attacks;
- Use of auto-subdomain function;
- Email of the site administrator;
- Default index pages;
- Default site encoding;
- HSTS and SSI;
- Usage of open_basedir and CGI scripts;
- Logging settings.
After clicking the “Create” button, the site will appear in the “Sites” section. If you specified these parameters on the site creation form, SSL certificate issuance and CMS installation, as well as database installation for the site, will be performed in the background.

Configuration of DNS records
As a rule, DNS records are configured on the registrar's (domain name seller) side, as all records are contained by default on its NS servers.
If you want to manage DNS records locally in the panel, you will need to configure your own name servers. You can manage these records in the “DNS Management” - “DNS Records” section.
Placing content on the site
You can place content for the site in several ways. The most accessible one is the built-in file manager. To go to the home directory of the site, click on the “Site files” button in the “Sites” section.

This will open a tab with the file manager interface where you can manage files, upload or download them.

Alternatively, you can manage your site files using an FTP client or in the console by connecting to the server via SSH.
Setting up an SSL connection
In order for a site to be accessible over a secure connection (HTTPS), first install an SSL certificate. This can be done in two ways:
- Generate a free certificate from Let's Encrypt directly in the panel;
- Purchase an SSL certificate and install it for the domain.