
How to deploy Nextcloud with Docker in ispmanager 6
In this guide, we will go through the steps of setting up an environment to run NextCloud. We’ll show you how to start NextCloud on your server with the Docker interface in ispmanager 6, and how to set up and run containers with the required software – Nginx, MySQL, PHP, and Nextcloud.
You won’t need to learn Docker or its commands, we’ll use the interface in ispmanager 6 pro or host.
Preparing the environment
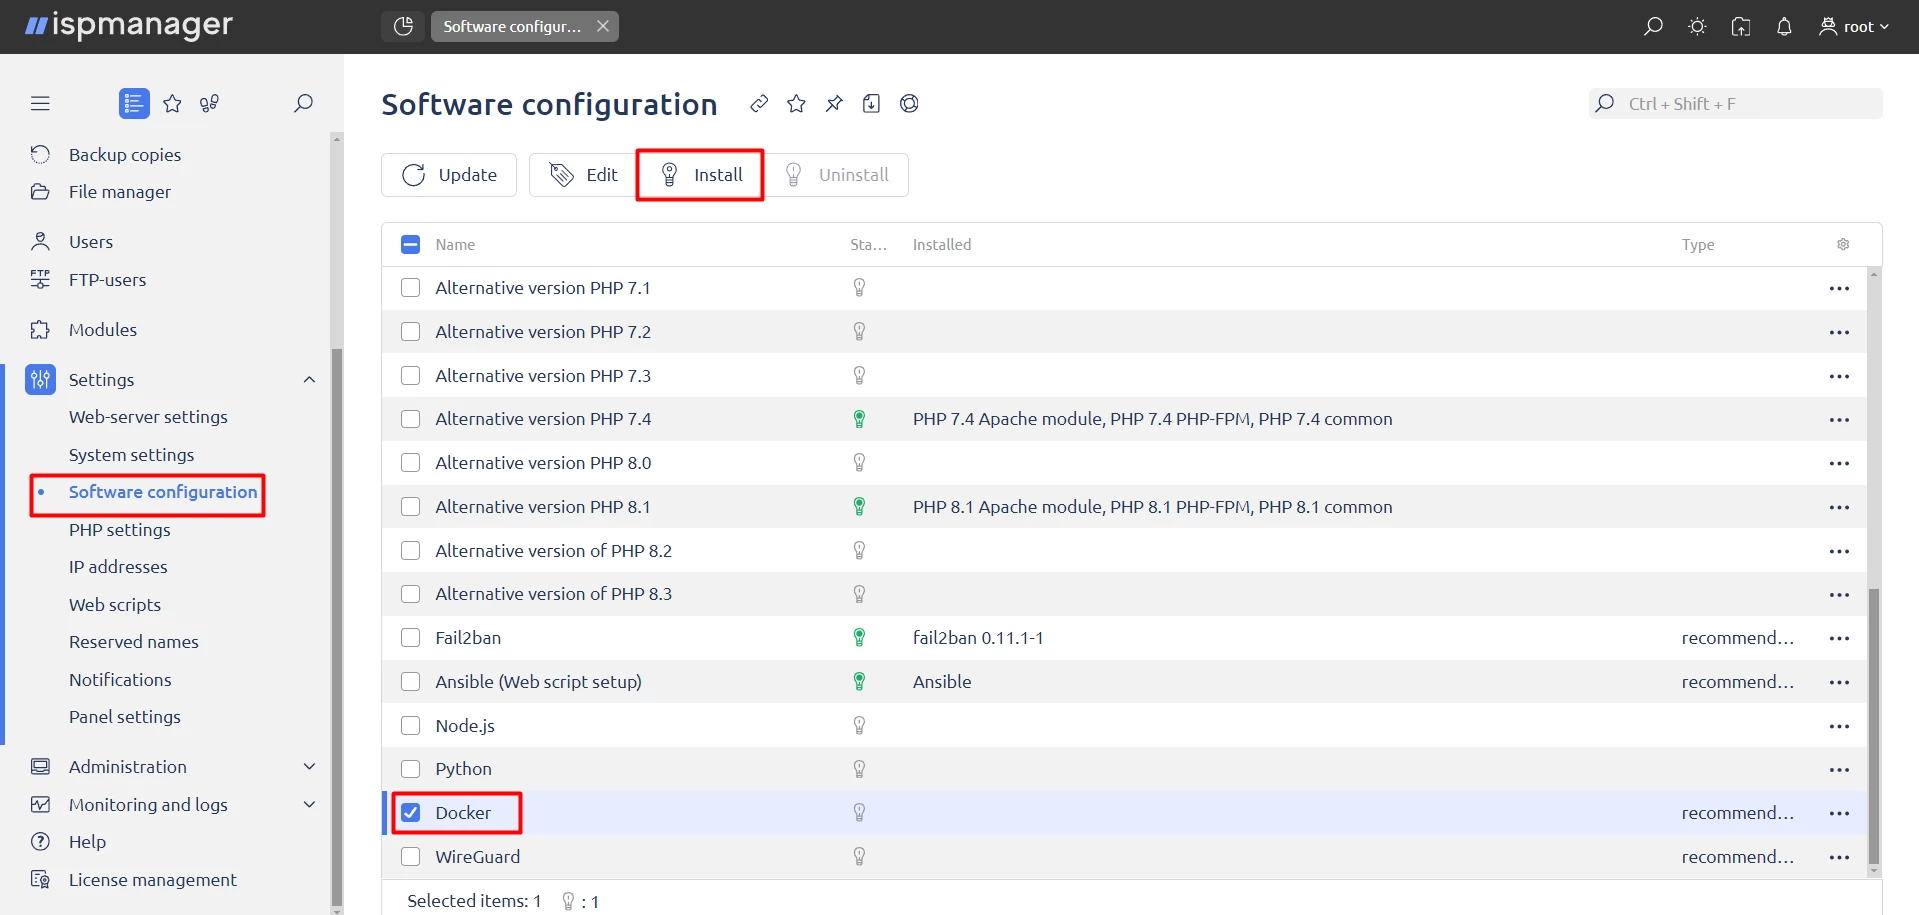
First, we need to install Docker. Go to the "Settings" section of the toolbar. Then, to "Software Configuration", select Docker, and click "Install". After the installation is complete, the panel will be reloaded and the Docker menu entry will appear in the toolbar.
In the Shell client, using the systemctl utility, we can verify that Docker is running:
	systemctl status docker
	docker.service - Docker Application Container Engine
	Loaded: loaded (/usr/lib/systemd/system/docker.service; enabled; vendor preset: disabled)
	Active: active (running) since Вт 2024-02-20 04:33:23 UTC; 1min 22s ago
Now we’re ready to download images and run the containers with the services we need.
Creating Docker containers
For Nextcloud to work properly, we need MySQL, Nginx, PHP, and a container with the application itself.
Creating the MySQL Docker container. To start the container with the MySQL version we need, use the panel functionality to install alternative versions MySQL.
In ispmanager, alternative MySQL servers are brought up in Docker containers independently, so you don't need to start any containers in the Docker menu; they are available immediately.
This is described in detail in the official documentation →
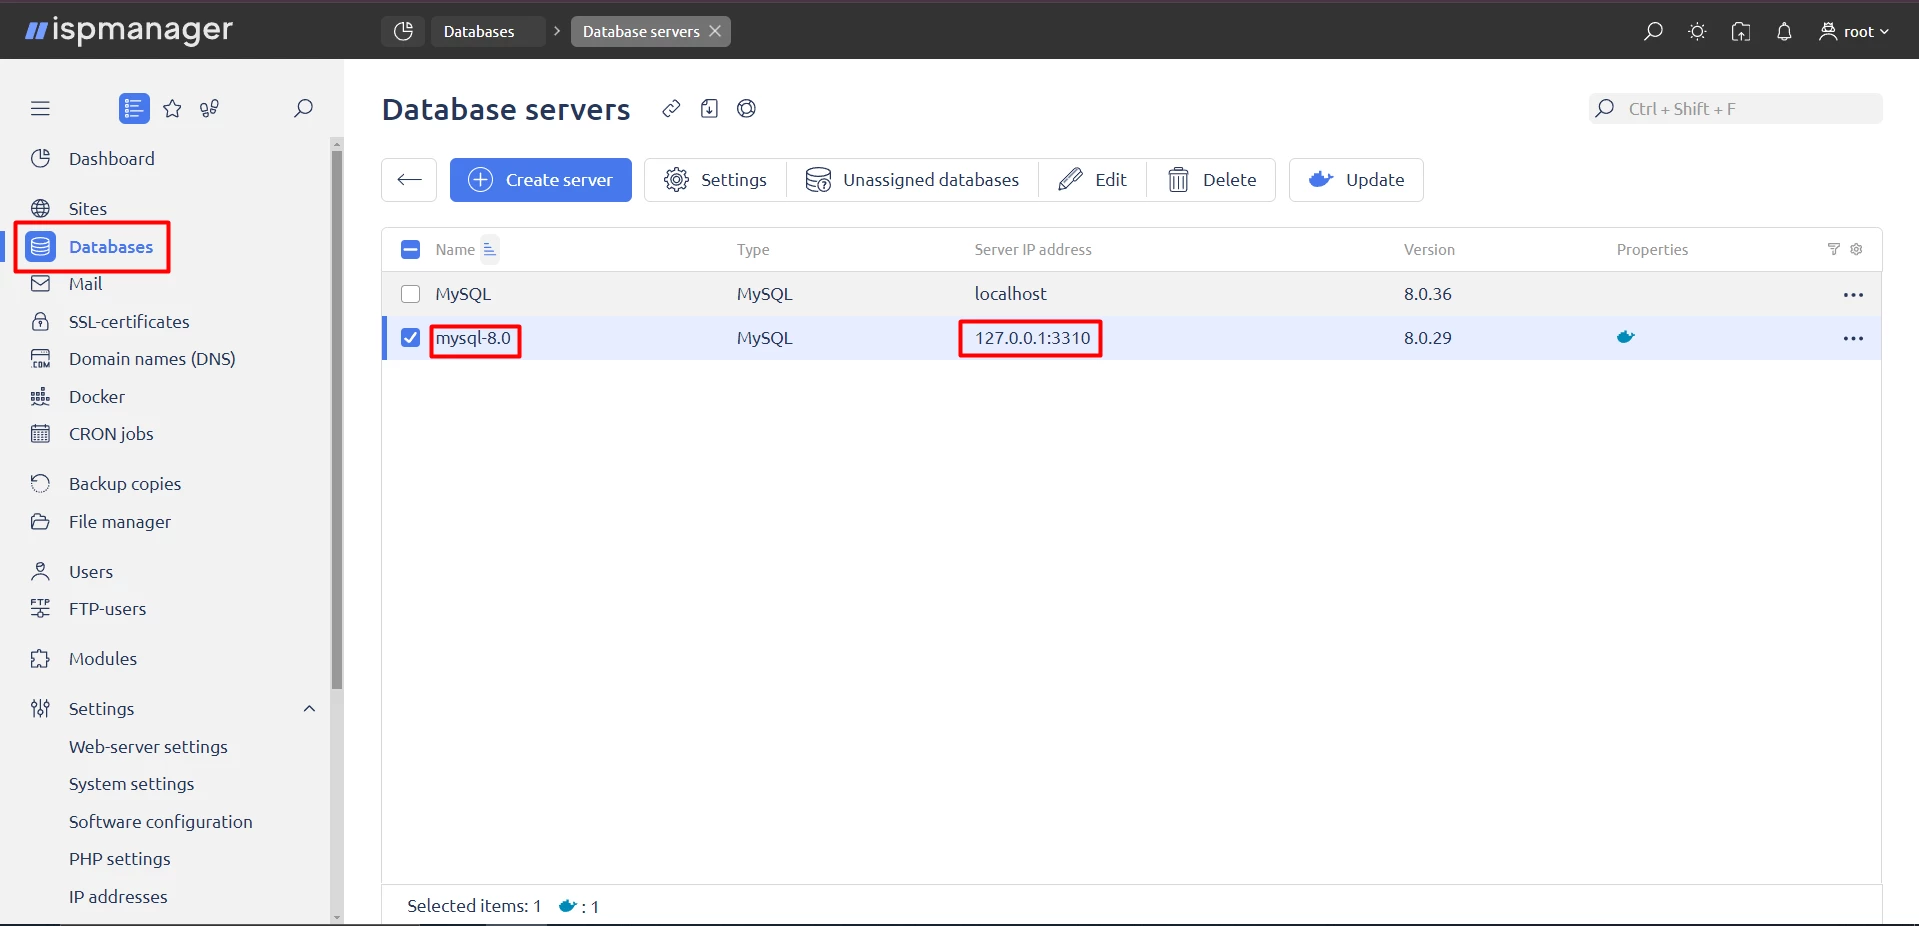
In the ispmanager panel interface, go to "Databases" → "Database Servers" → "Create Server". Then, fill out the settings form for the database server. MySQL 8.0 works well with Nextcloud, you can select it from the drop-down list MySQL versions. Fill in the server name, generate a password, and click "Create".
After installation, MySQL 8.0 will appear in the list of database servers. In this case, it is listening to 127.0.0.1:3310.
We can also see the container in the shell client using the docker ps command:
        2134a70ba987
	mysql:8.0.29
	"docker-entrypoint..."
	About a minute ago
	Up About a minute 33060/tcp
	127.0.0.1:3310 → 3306/tcp
	mysql-8.0
A container was created from mysql-8.0 image and directory mapping was added: /var/lib/mysql-8.0:/var/lib/mysql and /etc/ispmysql/mysql-8.0:/etc/mysql/conf. Port 3310 was forwarded to 3306 but remains on the local network. There is no need to forward the port of the database server container to the global network.
The first container is up and running. We can now access it and create databases and users through the ispmanager interface.
Let's create a database for our Nextcloud app. Go to "Databases" → "Create Database" in the panel interface.
Choose a name, MySQL 8.0 database server, create a user and password, and click "Create".
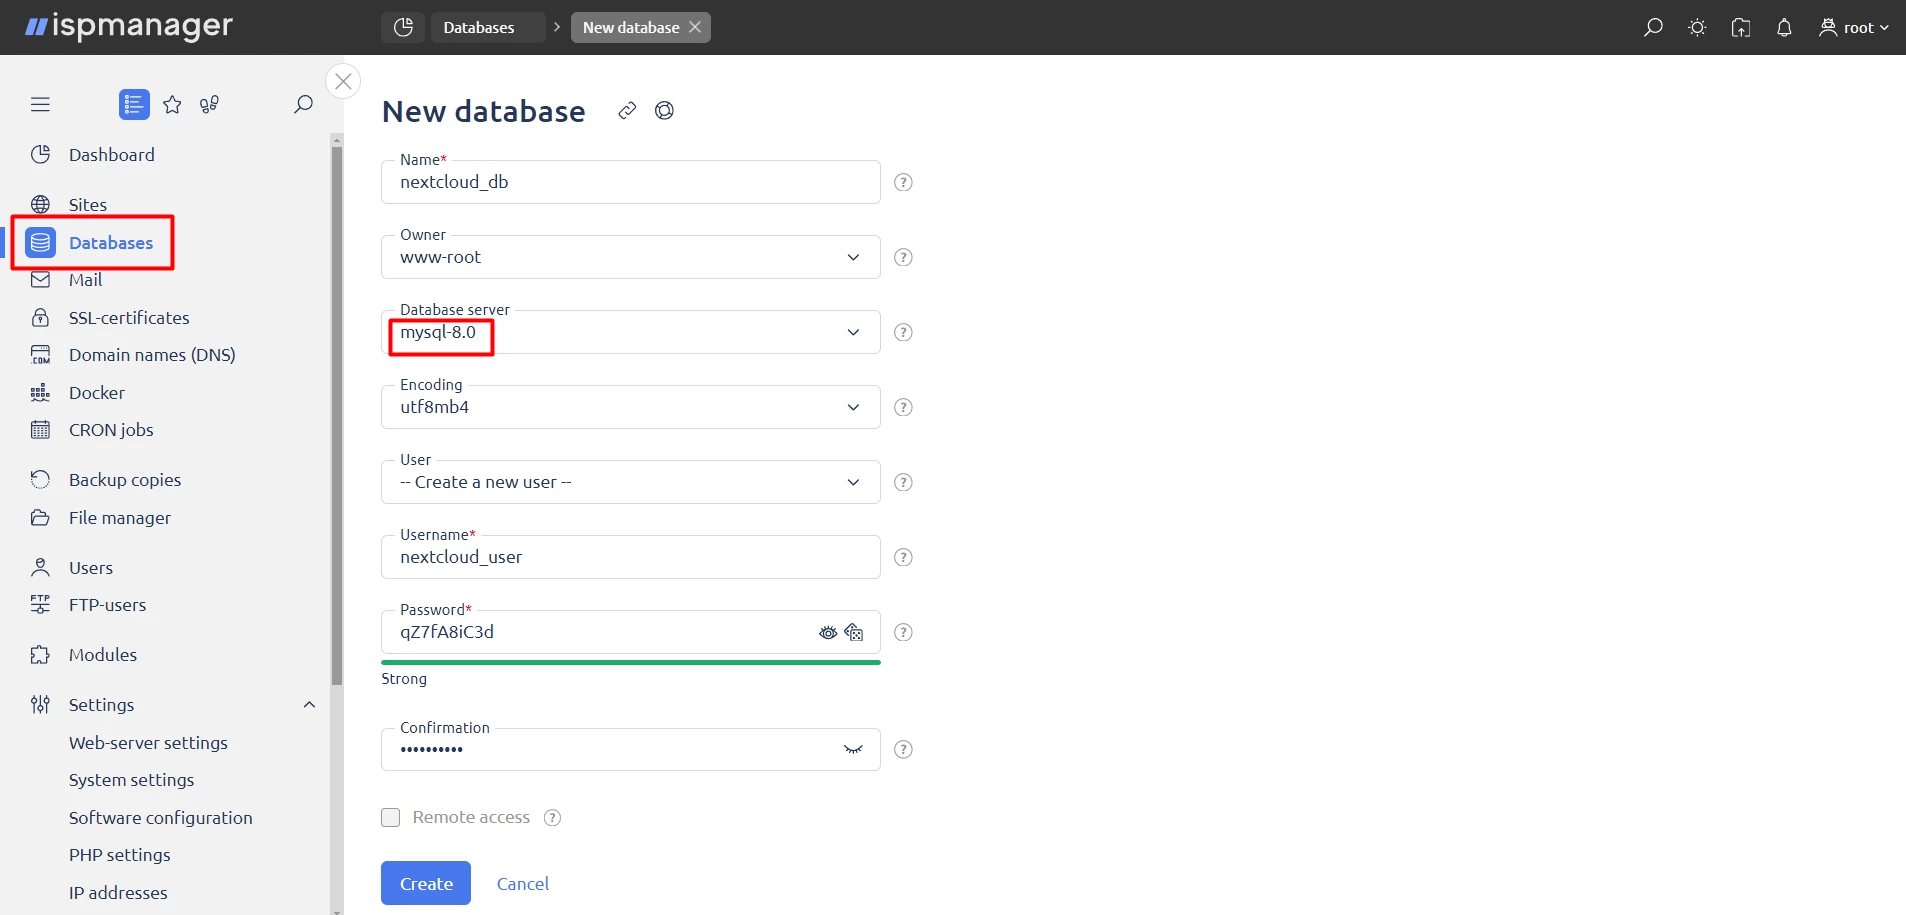
The database has been created and appears in the database list.
Next, we’ll use this database to customize our Nextcloud configuration.
Creating a Nginx Docker container. Now, let's create a Nginx web-server container that will listen on the 80 and 443 ports, giving us access to the web interface of our future app.
In ispmanager, open the Docker section. Here, we can see the container we created with MySQL 8.0. Click "Create container".
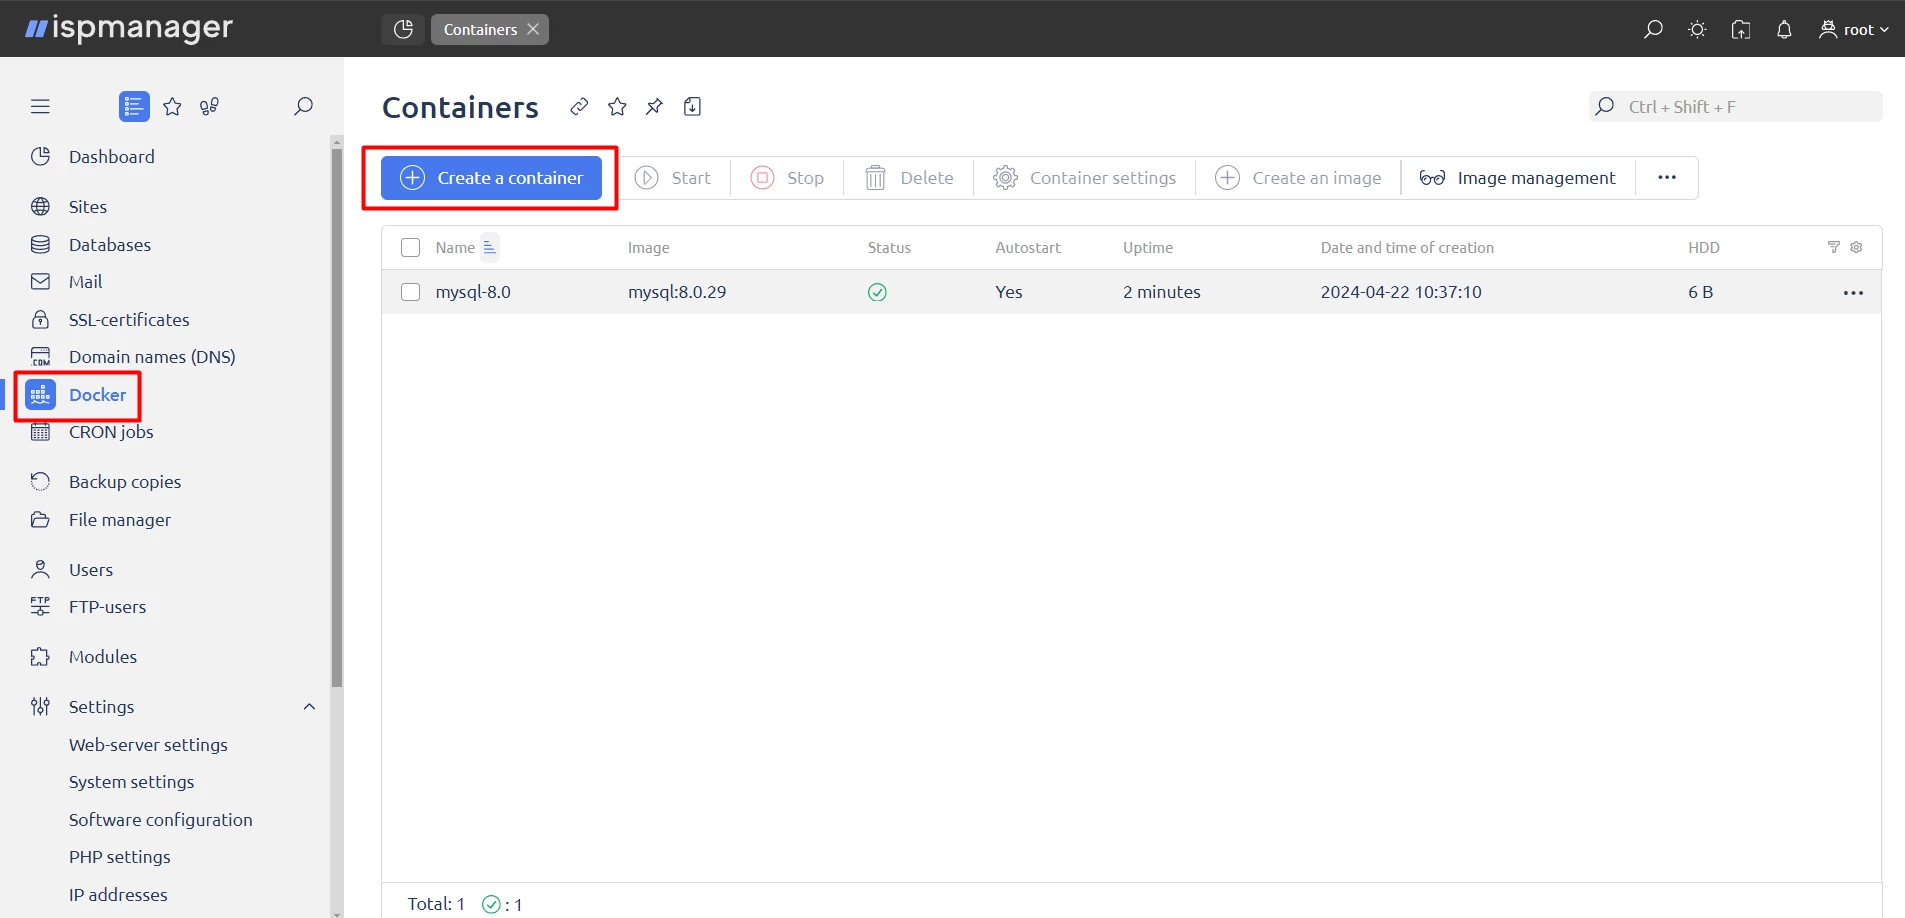
In the list of images, find Nginx and click "Select". In the container settings form that opens, go to the "Extended Settings" section to get more options. Use the default option and select the Restart always mode from the drop-down list. Use the default option. The restricted fields can be left blank if you don't need to set specific limits.
In the "Folder mapping" section set up folder and file mapping on the server and inside the container. To configure Nginx, let's map the directory of our site's future configuration from the server at /etc/nginx/vhosts/www-root/ to the directory inside the container, /etc/nginx/conf.d/. This is necessary so we can configure our site's config directly from the server, without direct access to the container itself.
In the port mapping section we can map the port address of our server to the container port. By default, we won't be able to map ports 80:80 and 443:443, because the 80 and 443 ports are already occupied by the pre-installed Nginx panel when installing the panel with the recommended software. We will map ports 8888:80 and 4343:443, so in this case, from the container, Nginx will accept requests on server_ip:8888 and server_ip:4343.
Click "Create".
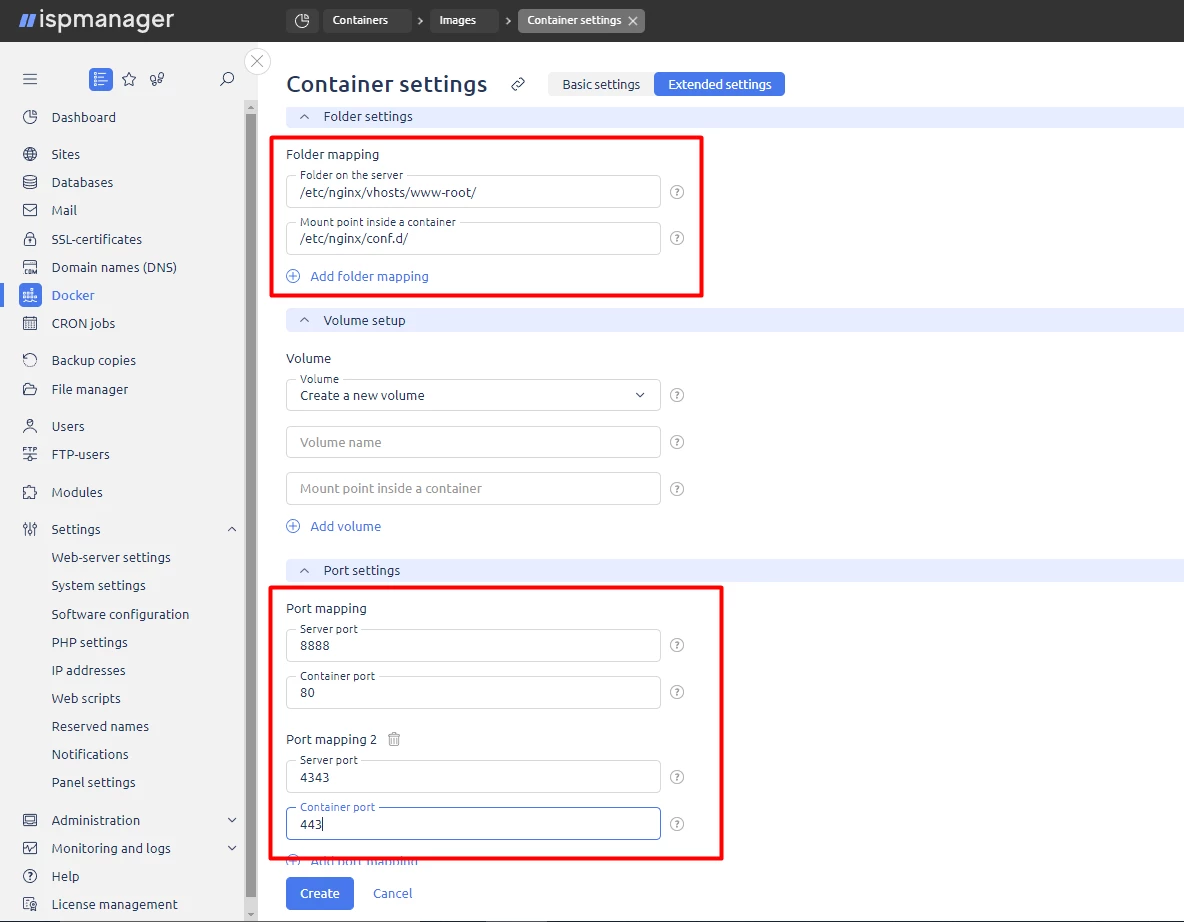
We’re done creating the container. With the docker ps command, we can see it in the Shell client:
	1d0338550c6a
	nginx:latest
	"/docker-entrypoint…"
	7 seconds ago
	Up 6 seconds
	0.0.0.0:8888 → 80/tcp
	:::8888->80/tcp
	0.0.0.0:4343->443/tcp
	:::4343->443/tcp
	nginx
We can go to http://server_ip:8888 and see that from the container Nginx is already accepting requests.
Creating a Docker container for PHP-FPM. In our case, in conjunction with Nginx, PHP-FPM will handle the PHP scripts in which Nextcloud is written.
The PHP-FPM image is not listed in the list of images available from the ispmanager 6 interface, but we can download it manually through the Shell client with the command:
docker pull php:fpm
Once the download is complete, we can verify that the image is available locally using the docker images command:
	php
	fpm
	353046de33f8
	3 days ago
	499MB
Let's use the panel interface to create the container.
Open Docker → "Create Container" → "Local Storage" → php:fpm → Select". Add the /etc/php-fpm:/etc/php-fpm folder mapping and click "Create". The container has been created and it is listening on local port 9000:
	61510e18eecf
	php:fpm
	"docker-php-entrypoi…"
	Up 12 seconds
	9000/tcp
Create a container for Nextcloud. In the panel interface, go to Docker → "Create Container" → Nextcloud → "Select" → "Advanced Settings". In "Folder mapping," we will move the directory of our website on the server, /var/www/www-root/data/www/domain.com, to the directory inside the container /var/www/html.
Create the container. Now we can see that it is available in the list and active:
	231d8da83d86
	nextcloud:latest
	"/entrypoint.sh apac…"
	About a minute ago
	Up About a minute   80/tcp
	nextcloud
If you go into the root directory of your site on the server, you’ll see that the Nextcloud files have appeared in it since we've mapped it to the container directory.
You can find out the addresses of the containers by using the docker inspect ID command, where ID is the container ID. You can find the container ID using the docker ps command. We will need the addresses to customize the site configuration.
We have created all the containers we need and now we need to get them interacting.
Customizing container interactions
Now we need to have requests on our site domain on the 8888 or 4343 port go to Nginx in the container, Nginx is linked to the root directory of our site with Nextcloud files, content is dynamically processed using PHP-FPM, and MySQL in the container interacts with Nextcloud.
Setting up the Nginx configuration. Let's use the panel to create a new site that will be used to access the Nextcloud interface. Go to the "Sites" section, then "Create Site".
Detailed documentation on site creation →
We included the root directory of the site when creating the Nextcloud container.
In the second step, we put the directory with our site configuration into the container. As such, the Nginx configuration can be managed from the ispmanager 6 interface.
Go to "Sites" → select our site → "Configuration file".
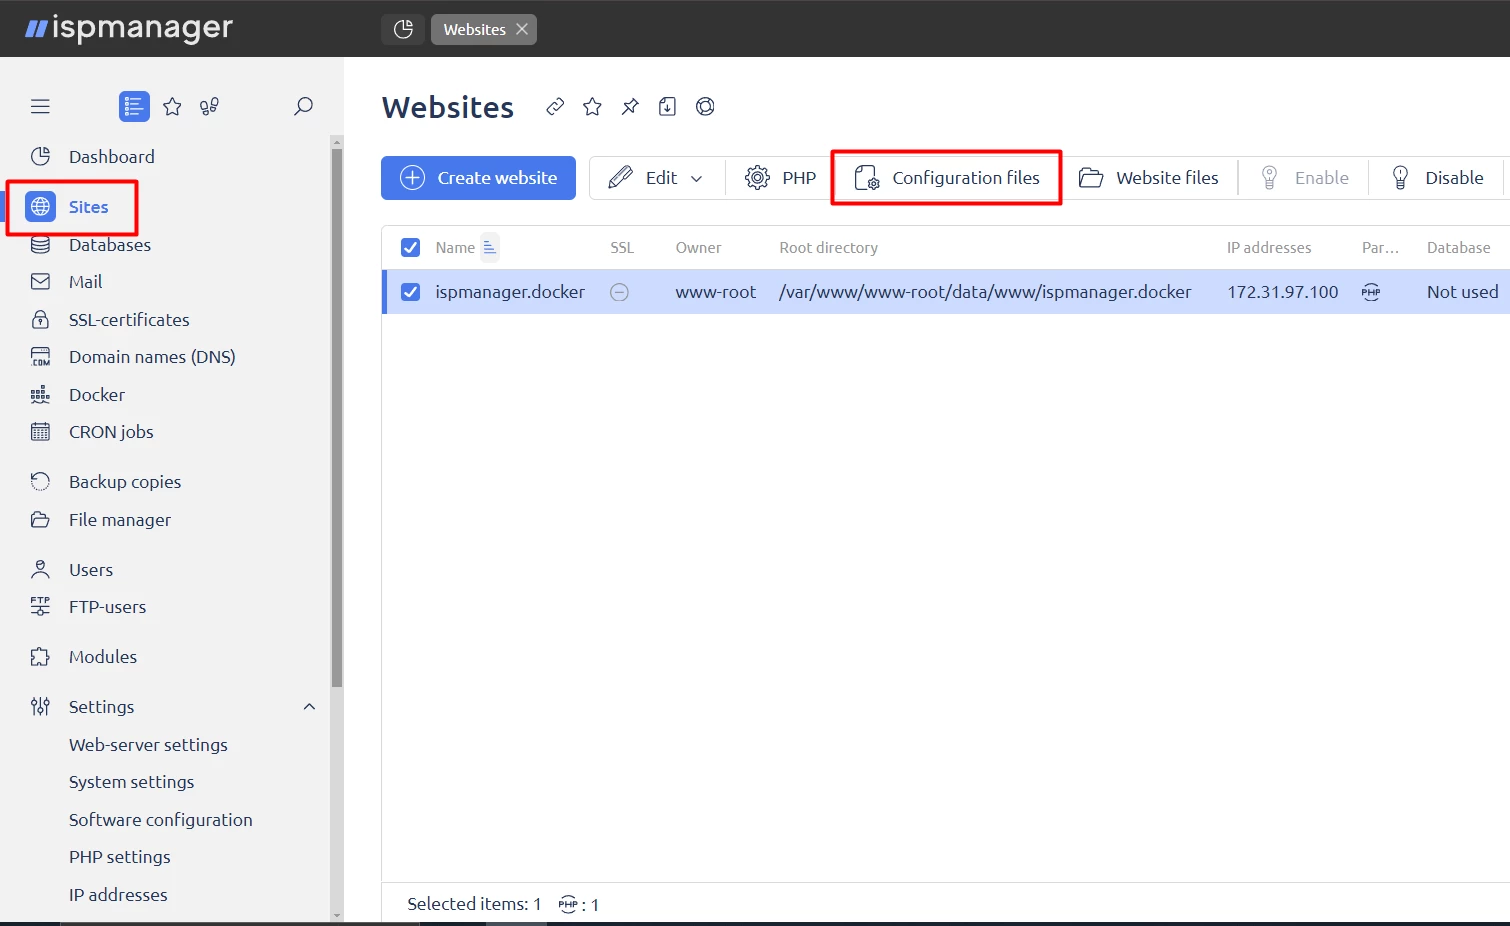
Let's include a fairly simple Nginx config that will link to our containers with proxy_pass:
server {
listen 8888;
server_name domain.com;
location / {
proxy_pass http://172.17.0.5:80;
proxy_set_header Host $host;
proxy_set_header X-Real-IP $remote_addr;
proxy_set_header X-Forwarded-For $proxy_add_x_forwarded_for;
proxy_set_header X-Forwarded-Proto $scheme;
    }
location ~ \.php$ {
include fastcgi_params;
fastcgi_pass 172.17.0.4:9000;
fastcgi_param SCRIPT_FILENAME $document_root$fastcgi_script_name;
fastcgi_index index.php;
    }
}
The address of our Nextcloud container is 172.17.0.5 and the address of the PHP-FPM container is 172.17.0.0.4.
Save the configuration and restart the container with Nginx. To do so, enter the command docker restart ID.
Now, the Nextcloud start page will open http://domain.com:8888
Adjust the Nginx config parameters to your liking.
Nextcloud installation and configuration. After opening the Nextcloud installation page, enter the administrator login and password, as well as the data needed for access to the database.
Database access will be created in the "Creating Docker Containers" stage after installing the MySQL container. We can find the host of the database server in the "Databases" section of ispmanager 6. After filling in the fields, click "Install" and wait for it to finish.
Nextcloud is now ready for use.
What we’ve done: we’ve isolated the services we need in containers using ispmanager 6, deploying Nginx, PHP-FPM, MySQL, and Nextcloud inside separate containers and ensured they can interact.
If you still have any questions, visit our Facebook community and we'll help you figure everything out.
